
When you need to sketch out and share ideas visually, nothing beats a digital whiteboard. These online apps replicate the collaborative dynamic of a physical whiteboard in an office meeting room but accommodate a hybrid workforce — and each board you create remains accessible and can be added to over time.
Microsoft Whiteboard is the digital whiteboard app included with the company’s Microsoft 365 suite. You can draw on and add shapes, text, and other elements to whiteboards you create in the app. If you use Whiteboard by yourself, it’s basically a simple drawing tool. But when it’s used as a collaborative tool, you and your co-workers can illustrate and map out ideas on a shared canvas.
You can use Microsoft Whiteboard as an online app through a web browser, as a desktop app for Windows, or as a mobile app for Android or iOS devices. If you’re using a Mac, a Linux PC, or a Chromebook, you can use the web app through your preferred browser.
You can also integrate Whiteboard into Microsoft Teams, and that’s where it reaches its full potential. You can create a Whiteboard tab in a Teams channel or chat that your team can use as a shared workspace for synchronous or asynchronous collaboration. Or you can share a whiteboard during a Teams meeting for real-time brainstorming, then continue to work with the whiteboard later.
To use Microsoft Whiteboard, you must have a Microsoft 365 account (personal, business, or school) or a free Microsoft account. Whiteboard offers more features under a paid Microsoft 365 account, most of which are helpful for collaboration. Also note that some features are available only to users under Microsoft 365 commercial plans.
In this guide, we go over the basics of using Microsoft Whiteboard and provide several tips to help you get the most out of this whiteboard tool.
Getting started
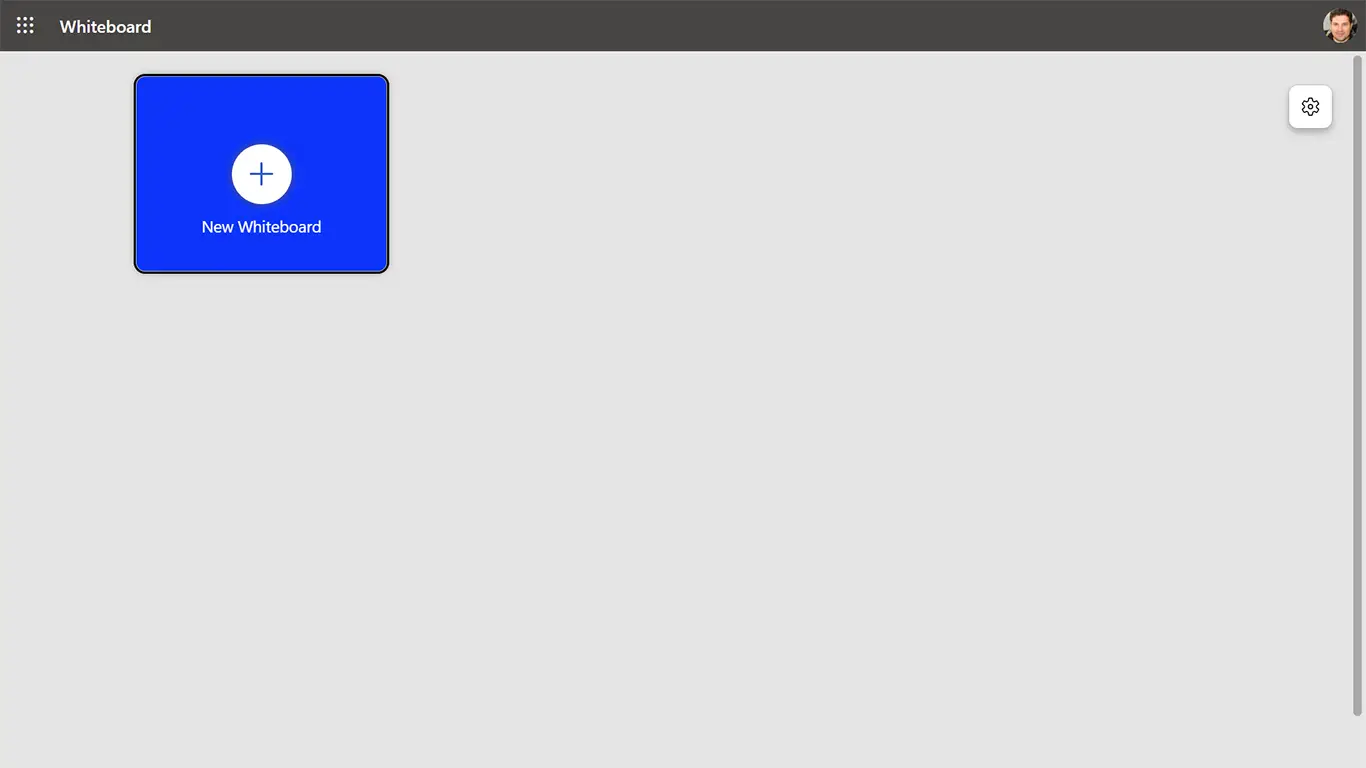
Launch the Windows, Android, or iOS Whiteboard app or open the Whiteboard web app in your browser. Eventually this home screen will show all the whiteboards you’ve created and that your colleagues have shared with you. If you and your team haven’t created any yet, you’ll see a mostly empty page.
 IDG
IDGJust click the big New Whiteboard button to start a new whiteboard. (Click image to enlarge it.)
Create a new whiteboard: Click or tap the New Whiteboard button.
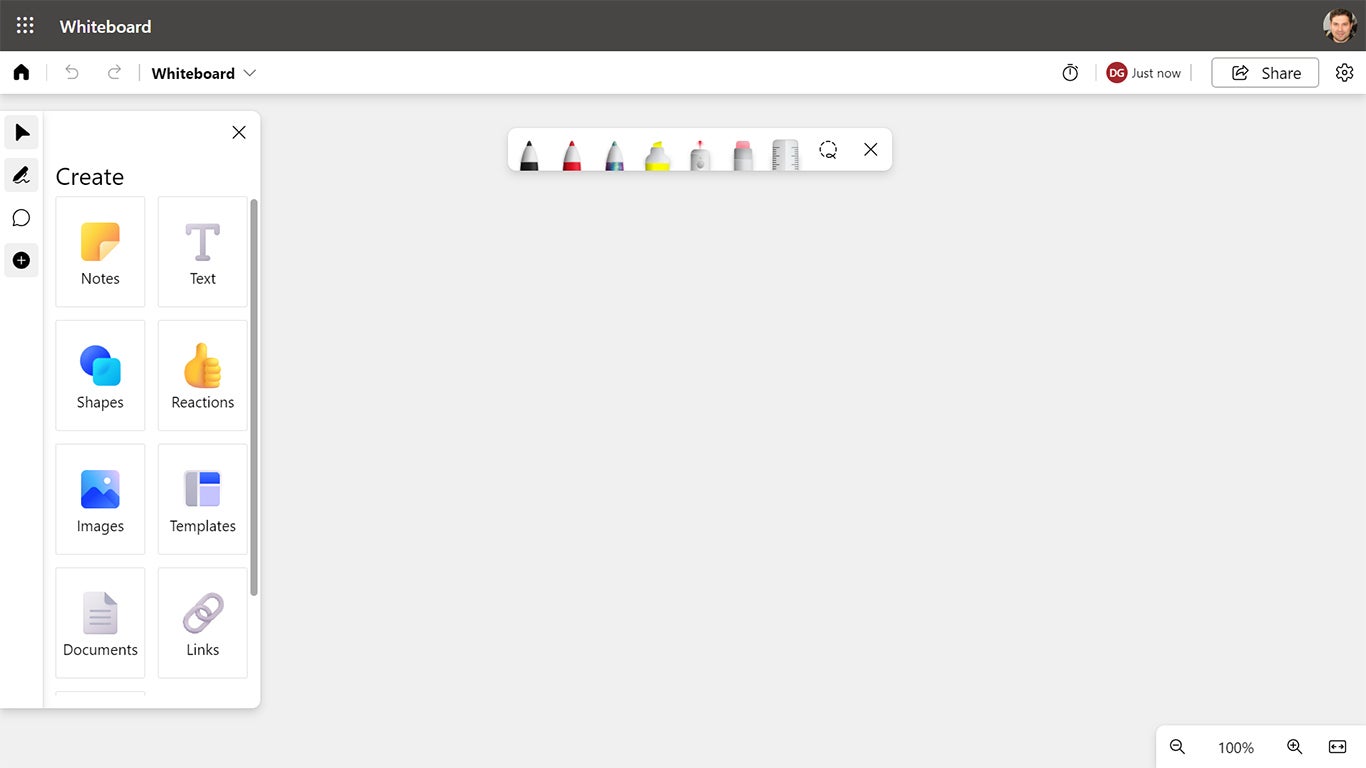
You’ll be taken to a blank whiteboard with a Create panel at left that you can use to add various elements to your whiteboard, such as text, shapes, or sticky notes. An Inking toolbar near the top of the whiteboard lets you pick from a variety of pens and other tools for drawing.
 IDG
IDGA blank whiteboard. (Click image to enlarge it.)
Add text to the whiteboard: Click the Text button on the Create panel, place your cursor on the whiteboard, and start typing.
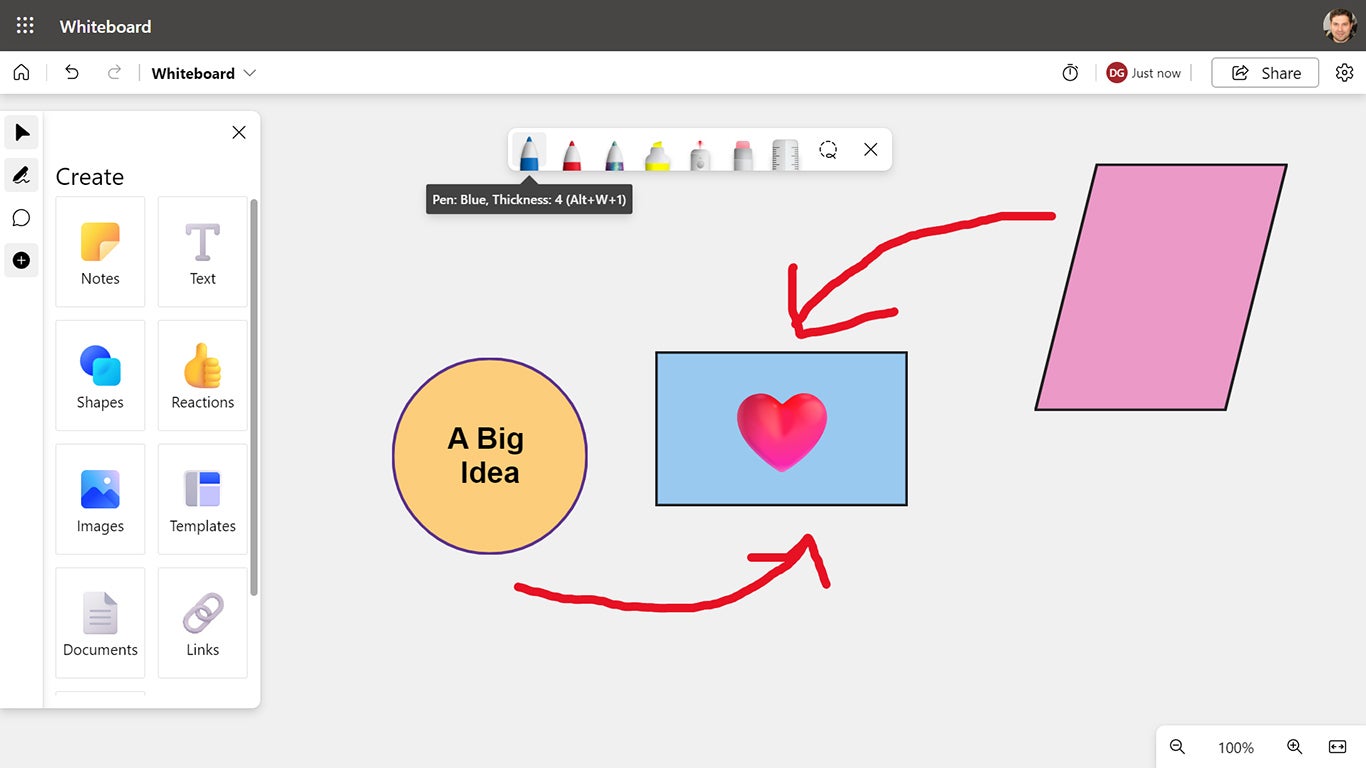
Add other elements: Click the appropriate button and make a selection. To add a shape, for instance, click Shapes and choose from the shape options that appear. To add an image, click Images, choose whether you want to upload an image stored on your device or search Bing Images, select the image you want, and click Open or Insert.
Draw on the whiteboard: Choose one of the pens from the toolbar at the top of the whiteboard and start drawing with your mouse, touchpad, or finger on a touch-enabled device.
 IDG
IDGYou can add shapes or images to a whiteboard, or draw on it. (Click image to enlarge it.)
Move an element: Select the item you want to move, then drag-and-drop it anywhere else on your whiteboard. If you’re in inking (drawing) mode, you might need to first click the Select icon on the toolbar at the left (a cursor arrow) before you’re able to select an element.
Resize an element: Select the element, then drag one of the circles that appear at its four corners.
Delete an element: Select the element, then click the trash can icon that appears above it.
Return to the home screen: Click the home icon at the upper left.
You can perform most of these same actions in the mobile app. Click the + icon at the bottom of the screen to see the Create panel.
That’s all you need to know to get started using Whiteboard. In the rest of the story, we’ll cover ways to get the most out of the app.
Putting together your whiteboard
Drawing on and adding elements to a whiteboard is easy — so easy that whiteboards can quickly become messy and hard to follow. Here are some tips for designing a better whiteboard.
1. Use sticky notes for text
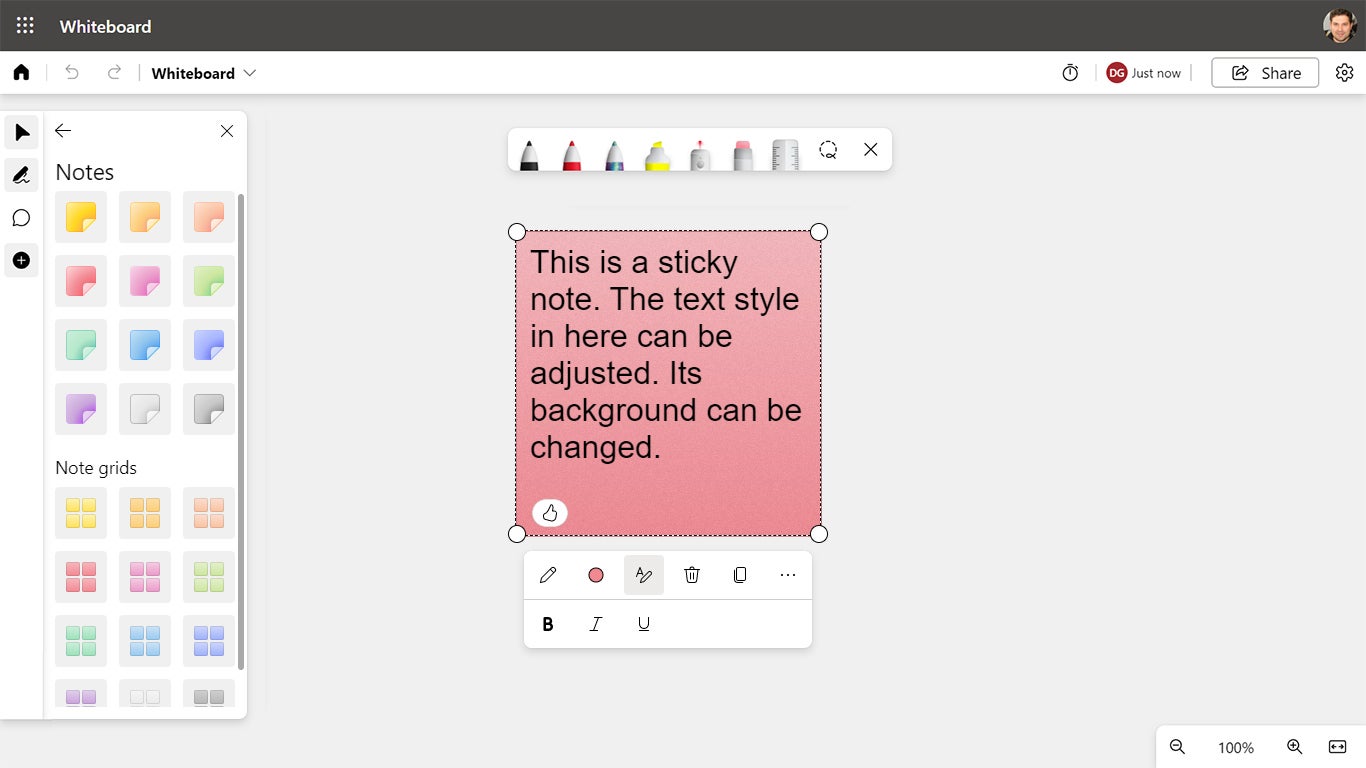
If you need to add a lot of text (for example, detailed information to explain an image on your whiteboard), use sticky notes. On the Create toolbar, click Notes, and on the pane that appears, choose a color from the options in the “Notes” section.
A sticky note appears as a square card on your whiteboard; inside it, you can type in text. You can change the text style (bold, italic, underline) and the background color of the note.
 IDG
IDGSticky notes are a great way to include and highlight text on your whiteboard. (Click image to enlarge it.)
You can move or resize a note just like any other element on the whiteboard. The size of the text inside the note automatically gets bigger or smaller as you resize the note.
Compared to adding text as an element directly on your whiteboard, a sticky note is more visible and more flexible and makes it easier to manage lots of text. As a general rule, adding text as an element directly on the whiteboard works best when you need a headline or just a snippet of text to identify something very briefly.
2. Use a note grid for even more text
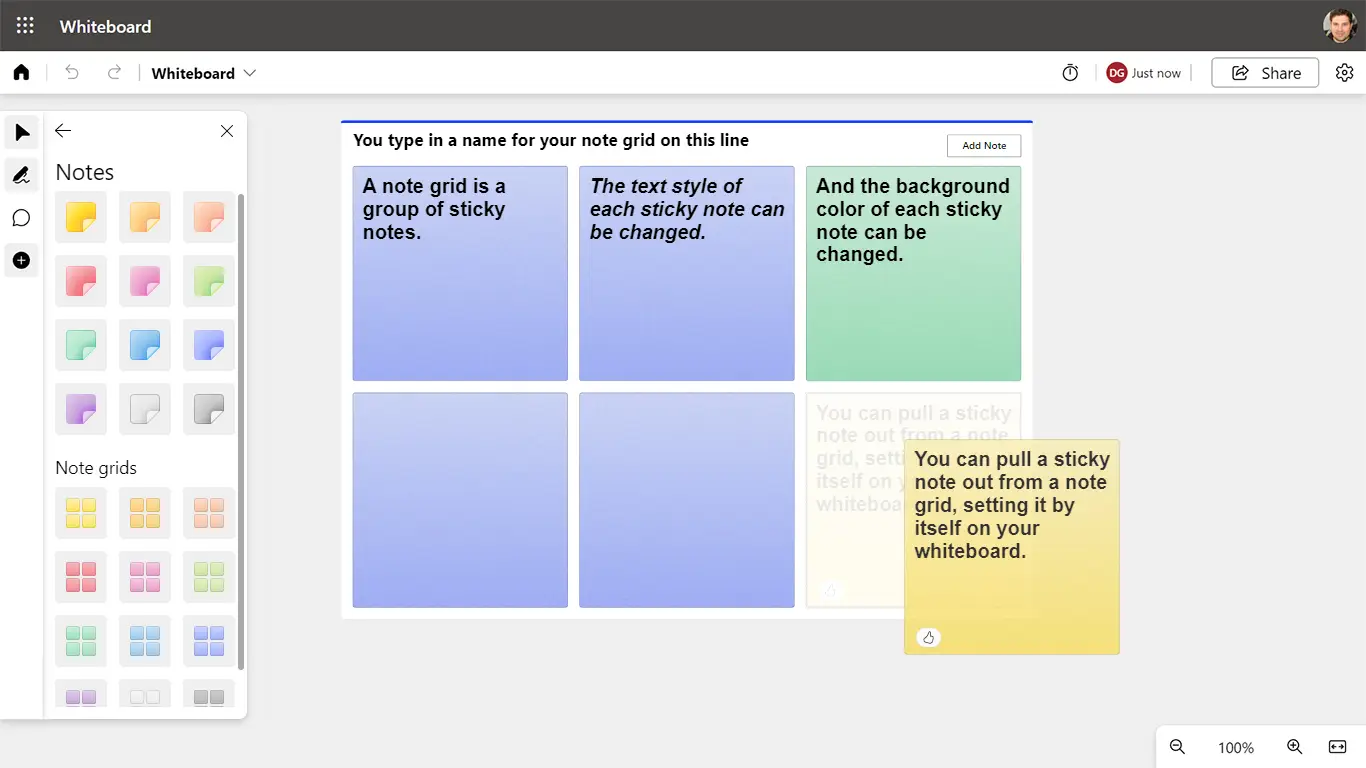
When you need to add even more information to your whiteboard, use a note grid. This is a group of sticky notes locked together in a grid layout. Each sticky note inside a note grid can be edited and manipulated like a regular sticky note, such as formatting its text and changing its background color.
 IDG
IDGNote grids help you organize large amounts of text. (Click image to enlarge it.)
On the Create toolbar, click Notes, and on the pane that appears, choose a color from the options in the “Note grids” section. (In the mobile app, click the + icon at the lower right and click Note Grid on the Create panel.) Click Add title at the upper left of the note grid, and then type in a title for the note grid. To add another sticky note to a note grid, click Add Note at the upper right of the grid. An additional, blank note will appear inside the note grid.
You can move or resize a note grid just like any other element on your whiteboard. As you resize a note grid, the sizes of all the sticky notes inside it adjust accordingly.
You can pull any sticky note out from inside a note grid: Select the note, then drag it out of the grid and onto another area of the whiteboard. You can also do the reverse: Drag a sticky note over a note grid, and it will be added to the grid’s group of notes.
3. Add multimedia to your whiteboard — judiciously
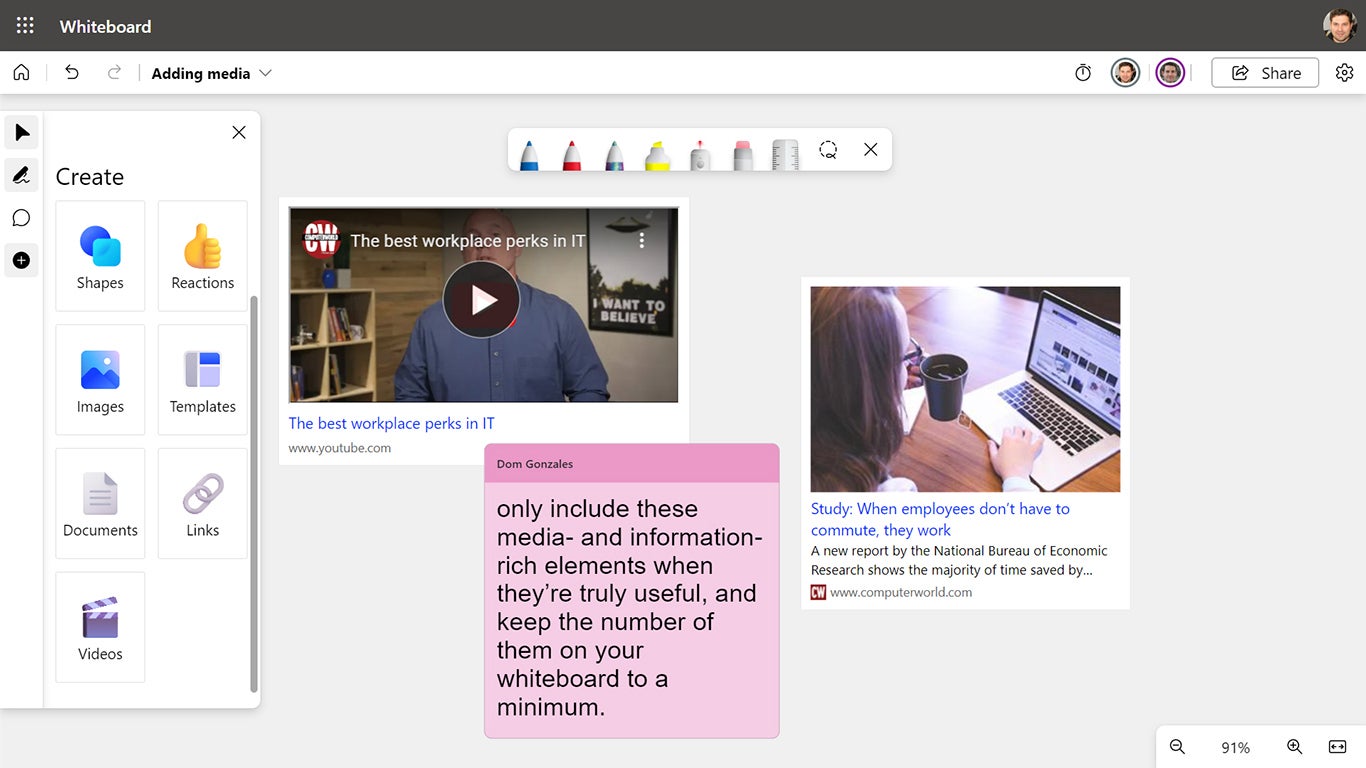
Whiteboard lets you add several multimedia and informational elements, including images, pages from a PDF, slides from a PowerPoint presentation, links to files or web pages, and embedded videos from YouTube or other locations. You can even embed Microsoft Loop components created in Outlook and Teams chat.
It’s fairly obvious how to add images, links, and videos — just click on those icons on the Create panel and follow the instructions that appear. To embed a Loop component, copy it in Outlook or Teams, then right-click on your whiteboard where you want to embed the Loop component and select Paste. To add a page from a PDF or PowerPoint file, select Documents from the Create panel, navigate to the file you want, click Select, select the page(s) or slide(s) you want to add, and click Insert.
Like other elements on your whiteboard, you can move and resize all these elements on it.
 IDG
IDGEmbedding multimedia elements on a whiteboard can be useful, but don’t go overboard. (Click image to enlarge it.)
We suggest exercising restraint, though — only include these media- and information-rich elements when they’re truly useful, and keep the number of them on your whiteboard to a minimum. A whiteboard should convey ideas in a simple way that’s easy to take in quickly, primarily through basic drawings, shapes, and text. Keep in mind that your colleagues may view your whiteboard on the smaller screens of laptops, smartphones, or tablets.
4. Start with a template
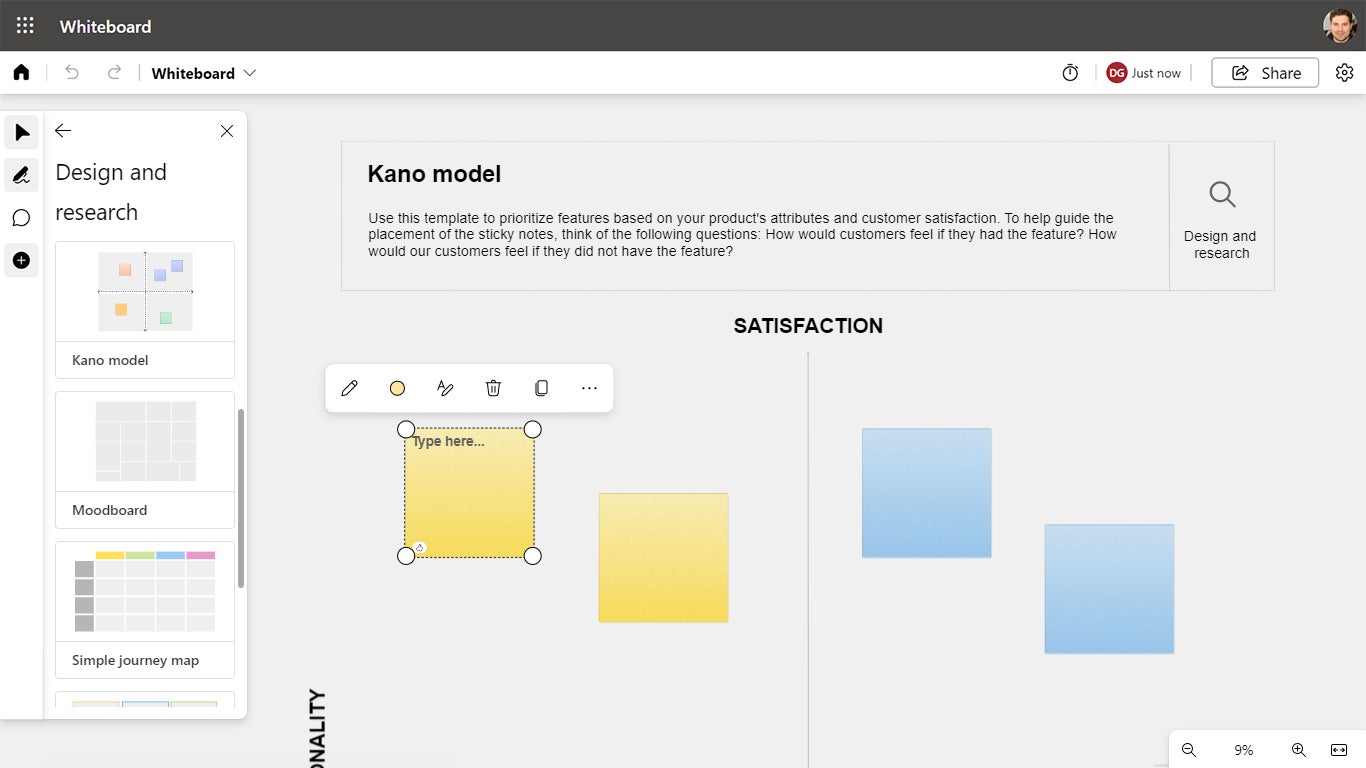
Staring at a blank whiteboard can be daunting. What’s the first thing you should put on it? To help you kickstart things, Microsoft Whiteboard provides more than 60 templates grouped into categories such as “Brainstorming,” “Design and research,” and “Project planning.” To browse through the available templates, click Templates on the Create panel, then select a category on the pane that appears.
Every template shows a helpful description of what it’s designed for when you hover over it. For example, under “Design and research,” the templates “Affinity diagram,” “Kano model,” and “Storyboarding” can be used to organize data and ideas regarding customer feedback.
 IDG
IDGUsing a template can be the key to a well-organized whiteboard suited to a particular purpose. (Click image to enlarge it.)
To use a template, select it from the left pane and drag it onto your whiteboard. It’s added as a customized note grid to your whiteboard. You’ll want to resize it much larger. Inside this grid, there will be blank sticky notes and text boxes that you’ll fill in with your own text.
Sharing your whiteboard
Like a physical whiteboard in an office, virtual whiteboards are meant for team collaboration. Once you’ve set up a whiteboard, you’ll want to share it with your co-workers so they can contribute to it.
5. Share your whiteboard from the Whiteboard app
With the whiteboard open in the web app or Windows app, click Share at the upper right. In the mobile app, open the whiteboard, tap the three-dot icon at the upper right, and select Share.
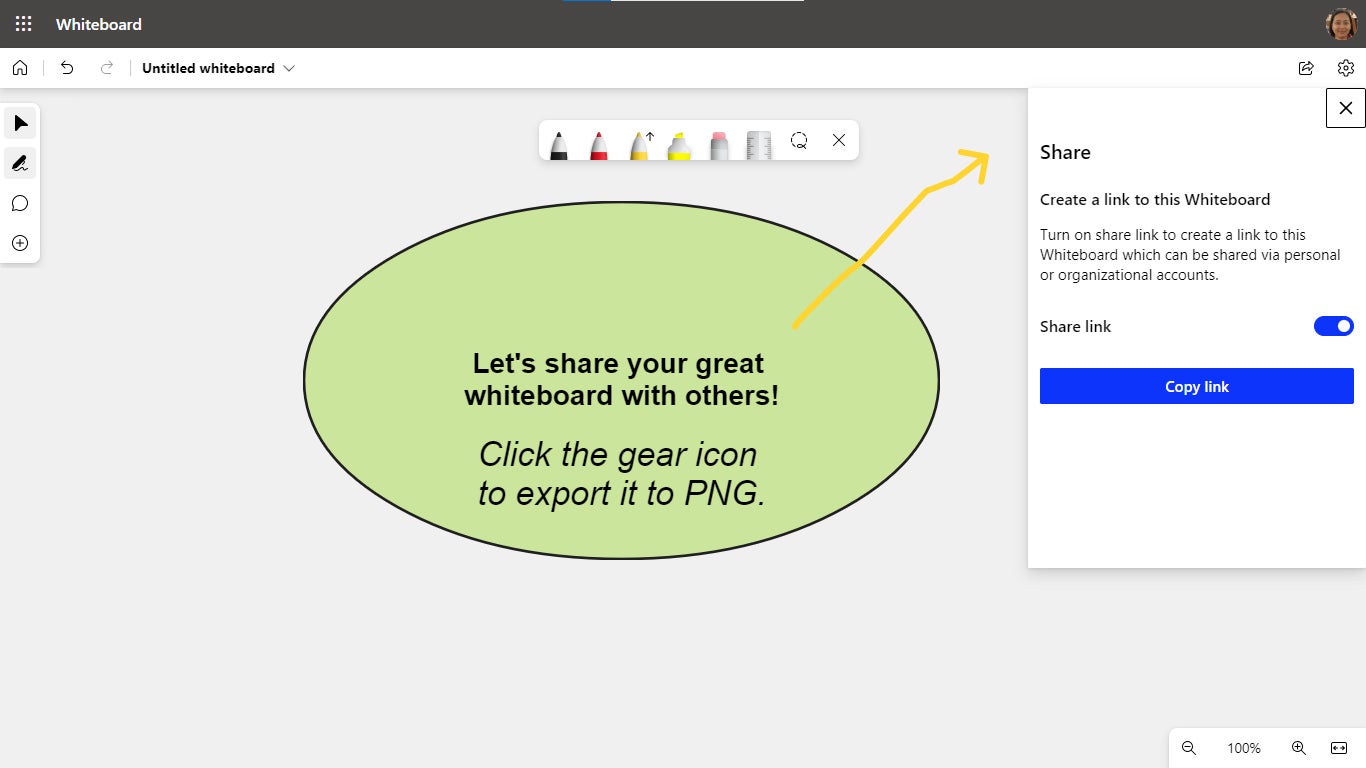
If you’re using Whiteboard from a personal Microsoft account (whether free or under a personal Microsoft 365 subscription): A panel opens on the right. Click the Share link switch and then Copy link. A link to your whiteboard will be copied to your PC’s clipboard. You can paste this link inside an email or other message and send it to others.
 IDG
IDGSharing a whiteboard from a personal account. (Click image to enlarge it.)
As long as the person clicking this link has a Microsoft account, they can view your whiteboard through a web browser or using the Whiteboard Windows app or mobile app. And they will be able to edit it — so be aware that whatever changes another person makes to your whiteboard, you’ll see them when you access the whiteboard with your own account. (If you want to share your whiteboard but don’t want others to be able to alter it, see the instructions below for exporting it as an image.)
If you’re using Whiteboard from a work or school Microsoft 365 account: When you click Share, a “Share…” panel pops up over your whiteboard.
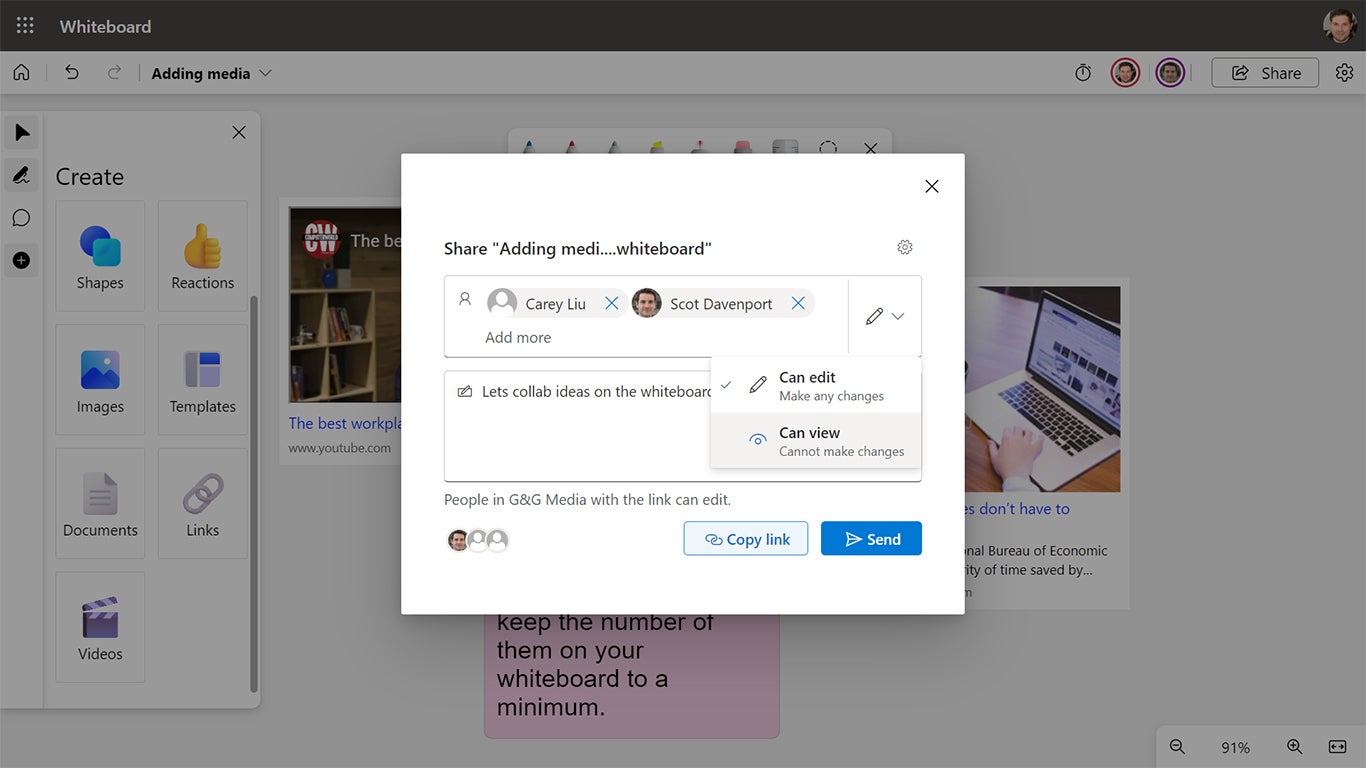 IDG
IDGInviting co-workers to collaborate on a whiteboard. (Click image to enlarge it.)
Enter the names, group, or email addresses of people who you want to collaborate on your whiteboard. By default, only people in your organization will be able to access your whiteboard, and they’ll be able to make changes to it. To change this, click the pencil icon; from the small panel that opens, click Can view — this lets people see but not make changes to the whiteboard (although this rather defeats the collaborative purpose of a whiteboard).
You can optionally type in a message for the link recipients. Then click Send. They will receive an email with the link to your whiteboard.
Alternatively, you can click Copy link. A link to your whiteboard will be copied to your PC’s clipboard. You can paste the link inside an email or other message and send it to others.
In addition to sharing whiteboards from the Whiteboard app, you can share and collaborate on them in Teams channels, chats, meetings, and 1:1 calls. These methods are covered below.
6. Export your whiteboard as an image
If you want to share your whiteboard outside your organization, you can export your entire whiteboard as an image file. Those who view it will not be able to edit it. This is also a good option if you have a personal Microsoft account and want to share your whiteboard without letting others make changes to it.
With your whiteboard open, click the gear icon at the upper right. On the menu that opens, click Export image. On the next panel, select Standard resolution or High resolution, then click Export. A screenshot of your entire whiteboard will be created in PNG format and saved to your PC or mobile device.
Next page: Tips for collaborating, using Whiteboard in Teams, more →
