
Quick: When's the last time you really, truly thought about your Android phone's Quick Settings setup?
If you're like most mammals I know, the answer probably ranges somewhere between “eons ago” and “never.” And it's no surprise: Android's Quick Settings area is one of those things that's just sort of there. It's convenient, sure, but it's all too easy to forget that it's completely customizable — and expandable, too. It can turn into an invaluable home for your own custom Android shortcuts, if you take the time to build it up accordingly.
The challenge, aside from simply remembering that you can expand that area of your phone's interface, is knowing where to begin. Google doesn't exactly have any great way of tracking down and identifying apps that offer Quick Settings additions, and even when you have an app with a cool Quick Settings option on your phone, you might not even realize it's there.
But hey, that's what I'm here for — that, and eating copious quantities of meatloaf. But the former is what's most relevant for our purposes today.
So set aside your own meatloaf stockpile for a moment, and let's dig into your device's equally delicious custom shortcut potential, shall we?
Android shortcut No. 1: Your timeout override switch
The shiny screens on these stunning modern smartphones of ours are typically set to turn themselves off after a certain number of seconds. And that's generally a good thing. Otherwise, the dodo brains among us (hiya!) would forget to shut our screens off every time we got distracted — by a dancing panda passerby, a plate of steaming squared meat, or whatever manner of diversion tends to claim your attention unexpectedly.
Sometimes, though, you genuinely want your screen to stay on for an extended period, even when you aren't actively caressing it. Maybe you're poring over a complex document, staring at one of those weird 3D image things everyone was obsessed with in the 90s, or considering which hue of chartreuse is the most rage-inducing color of all.
Whatever the case, an app called Wakey will give you a single-tap switch in your Android Quick Settings area to keep your screen on anytime the need arises.
To get it up and running on your phone:
- First, install the app (obviously, right?!). It's free with an optional $2 upgrade to remove ads and enable some extra features, and it doesn't require any unusual or eyebrow-raising permissions.
- Next, swipe down twice from the top of your screen to open your full Quick Settings panel. Tap the pencil-shaped icon at the bottom of that panel, then scroll all the way to the bottom of the list to find the “Enable Wakey” button down in the inactive tiles section. (If you're using a Samsung phone, you'll instead tap the three-dot menu icon in your Quick Settings area, select “Edit buttons,” and then scroll over to the right to find the inactive tiles section.)
- Press and hold that icon and drag it up (or left, with Samsung) into your active tiles area. If you want it to be especially easy to access, place it in one of the first four spots so that you'll see it in the top row of options — even just with one swipe down from the top of your screen.
 JR
JR And that's it: Whenever you want to prevent your screen from timing out and turning off, you can just tap that spiffy new Wakey tile. Just be sure to tap it again when you're done with whatever you're doing and ready to have your standard screen timeout kick back in.
Android shortcut No. 2: Your floating calculator
Ever find yourself needing to conduct a quick calculation whilst wading around the ocean of information on your favorite Android phone?
Sure, you could stop what you're doing, head back to your home screen, find your calculator app, and then open it up to perform your mathematic magic before plodding your way back to whatever app you started in — but goodness gracious, that's an awful lot of inefficient steps. And it's pretty inconvenient, too.
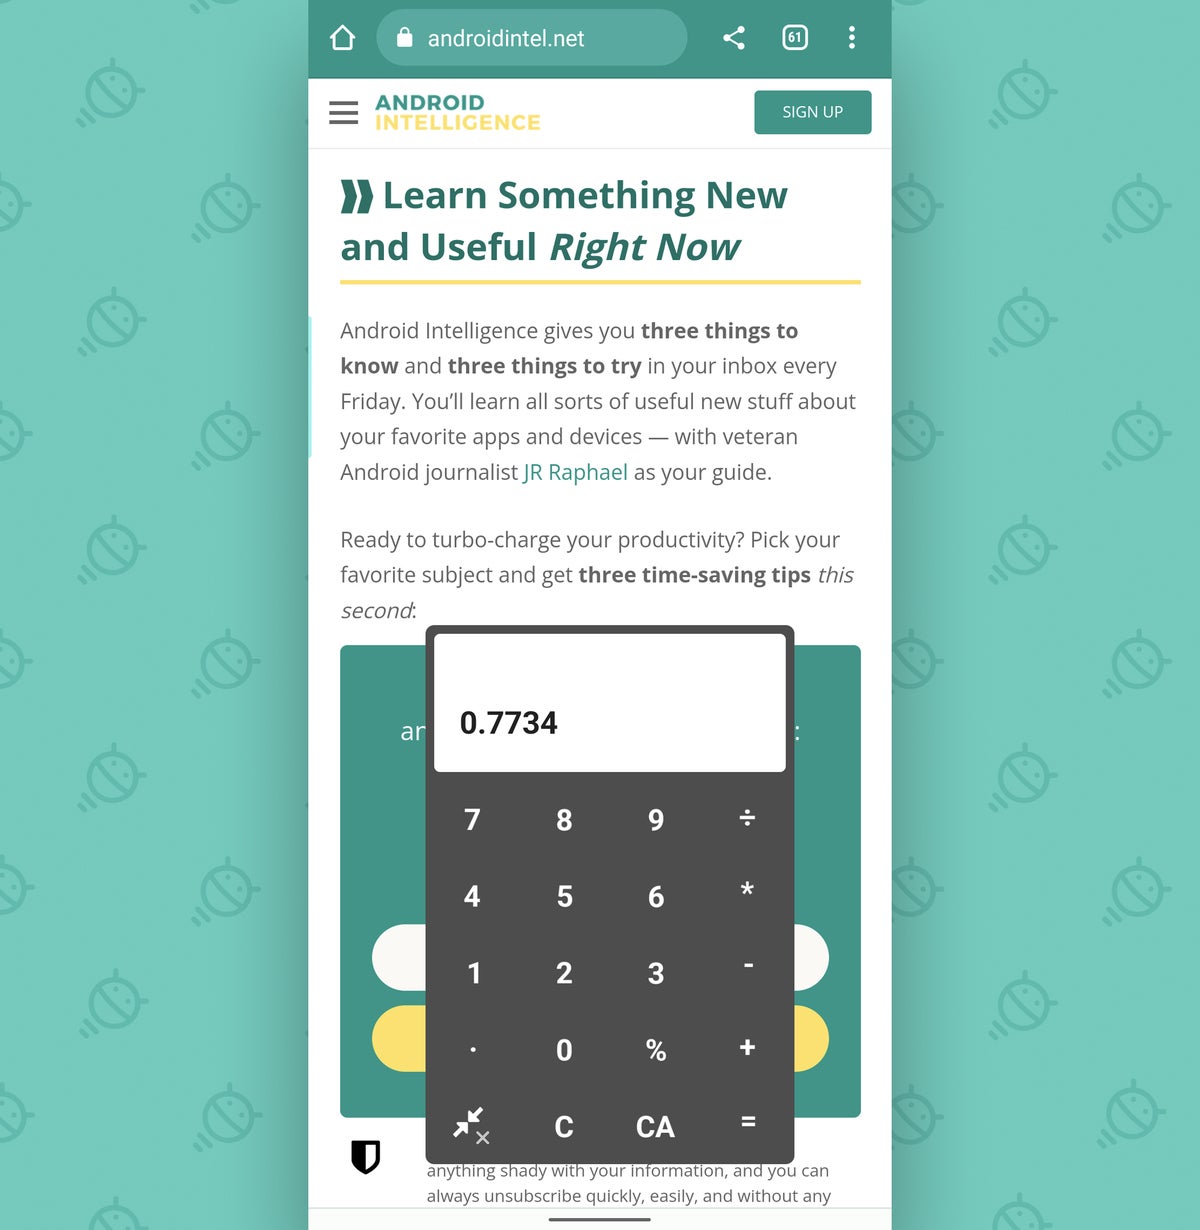
Instead, install an awesome app called Shortcutter and let it bring an easily summoned floating calculator into your phone's Quick Settings section. It's about as handy of a shortcut as you could ask for. See?
 JR
JR To create your own floating calculator shortcut:
- Install Shortcutter. It's free with an optional $2 upgrade for extra features, and it requires only sensible permissions related to what it needs to do.
- Open up the app — and once you get past the initial welcome screens, tap “Pull-Down” and then “Shortcutter Micro Apps & Services” within its main menus.
- Scroll down to the bottom of the screen that comes up next and flip the toggle next to “Floating Calculator” into the on position.
Now follow the same steps we over a second ago to add the tile into your Quick Settings panel:
- Swipe down twice from the top of your screen to open your full Quick Settings panel. Tap the pencil-shaped icon at the bottom of that panel, then scroll all the way to the bottom of the list to find the “Floating Calculator” button down in the inactive tiles section. (If you're using a Samsung phone, you'll instead tap the three-dot menu icon in your Quick Settings area, select “Edit buttons,” and then scroll over to the right to find the inactive tiles section.)
- Press and hold that icon and drag it up (or left, with Samsung) into your active tiles area. If you want it to be especially easy to access, place it in one of the first four spots so that you'll see it in the top row of options — even just with one swipe down from the top of your screen.
The first time you tap the tile within your Quick Settings panel, you'll be prompted to allow Shortcutter access to display over other apps. This is a perfectly safe permission to authorize and something the app clearly requires in order to do what it's trying to do with this.
Once that's done, you should be able to tap that tile anytime you've got some mind-boggling math to perform. That'll bring a little floating bubble onto your screen, like this:
 JR
JR And you can then tap that bubble to pull up your floating calculator whenever you need it. You can move the calculator around anywhere on your screen, minimize it back down to its floating bubble form to keep it around for future use, or dismiss it entirely if you want to send it away until you next summon it.
Not too shabby, I say. Not too shabby at all.
Android shortcut No. 3: Your on-demand app launcher
It's never too terribly difficult to get to any app on Android, but every extra step and wasted second can definitely add up — especially when the app in question is something you open multiple times a day.
Well, take note, you efficiency-loving earwig: That same tool we just finished talking about can give you a super-useful way to make any app available from anywhere in Android, no matter what you're doing — without having to hop back to your home screen and dig around to find it.
You just create a custom shortcut for the app in question right within your Quick Settings panel, and you can then pull it up anytime you want with a single swipe down from the top of your screen. Doesn't get much easier than that.
You could use this newfound power to make any app extra-easy to open, but where I find it to be particularly helpful is with Android security apps like two-factor authentication code generators — Google Authenticator, Authy, or whatever flavor you prefer — just because I find myself opening those things so freakin' often.
Here's how to make such apps infinitely easier and less annoying to access:
- Install Shortcutter, if you haven't already, and open it up.
- Tap “Pull-Down” followed by “Custom Tiles.”
- Tap the line that says “Custom Tile 1” and then select “Application” and choose whatever app you want to use for your shortcut from the list.
- Tap the same line again, select “Rename,” and change its name from “Custom Tile 1” to the actual name of the app you're using (or anything else, for that matter).
Now follow the same steps we over a second ago to add the tile into your Quick Settings panel:
- Swipe down twice from the top of your screen to open your full Quick Settings panel. Tap the pencil-shaped icon at the bottom of that panel, then scroll all the way to the bottom of the list to find the shortcut you created down in the inactive tiles section. (If you're using a Samsung phone, you'll instead tap the three-dot menu icon in your Quick Settings area, select “Edit buttons,” and then scroll over to the right to find the inactive tiles section.)
- Press and hold that icon and drag it up (or left, with Samsung) into your active tiles area. If you want it to be especially easy to access, place it in one of the first four spots so that you'll see it in the top row of options — even just with one swipe down from the top of your screen.
And how 'bout that? You've just cut numerous needless steps out of your day. Give yourself a pat on the back!
Android shortcut No. 4: Your recording quick-start
This next shortcut is specific to the Pixel owners among us: Google's self-made Android phones come with an outstanding audio recording called, rather fittingly, Recorder. It's a spectacular tool for recording everything from meetings to conversations and even rambling note-to-self memos, complete with Google's unmatched text transcription and even instant cross-device access of all your recordings.
But what few Android-appreciating animals realize is that Recorder holds a hidden shortcut that makes starting a recording a snap. And if you're carrying a Pixel phone, it's already there on your device and just waiting to be dug up.
All you've gotta do is open up your Quick Settings panel and tap the icon to edit it, just like we've been doing with every item in this collection — and then look closely at the list of inactive options at the very bottom of the list. Somewhere in that mess, you should see a tile labeled “Recorder.”
Press and hold that puppy and drag it up to the area with all your active Quick Settings options, and you'll then be able to find and tap it for a single-step way to start an audio recording almost instantly — no futzing, hunting, or time-wasting required.
(For more Pixel-specific shortcuts, by the way, see my earlier column: 7 hidden Pixel shortcuts you probably aren't using)
Android shortcut No. 5: Your built-in virtual remote
This next Android shortcut is another that's quietly lurking in your phone's dustiest corners and waiting to be discovered. And once you bring it out to the forefront, you'll wonder how you went so long without ever realizing it was there.
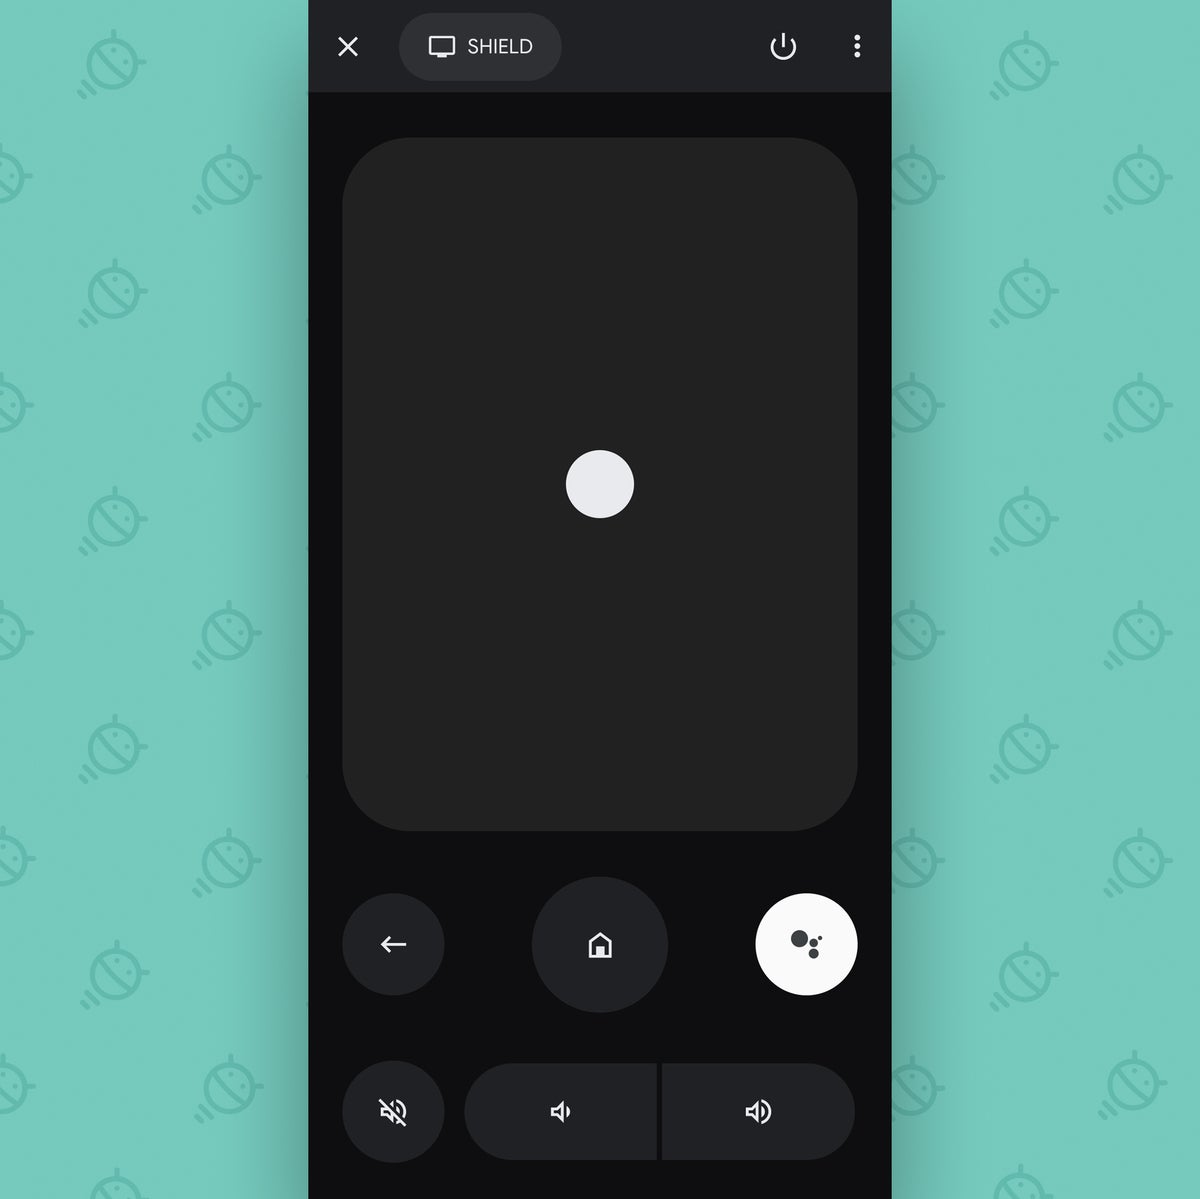
It's a native virtual remote for any Google/Android-TV-associated devices — everything from TVs with that software built in to set-top boxes and even the newer Chromecast dongle doohickeys. If you've got any such apparati in your home and/or office, this easy little addition will bring a brilliant upgrade to your life.
The secret to making this bit o' goodness appear is opening up the Google TV app — y'know, that thing that probably came preinstalled on your phone and that you've probably never bothered to look at. Well, get this: If you open that app up even once, a new TV Remote tile will magically appear in the invisible area of your phone's Quick Settings panel.
And from there, all that's left is to edit your Quick Settings — using the same exact steps from above — to drag it up or over into an active and visible position.
Once you do, you'll always have a universal control for all of your Google-connected screens at your frothy fingertips. Go, go gadget giddiness:
 JR
JR Not bad, right?!
Android shortcut No. 6: Your inbox memo machine
Last but not least in this li'l list of ours is one of my favorite recent Android shortcut discoveries. It's something I shared in my Android Intelligence newsletter, in fact, and something I've heard nothing but fantastic feedback on from other folks in the community who've tried it.
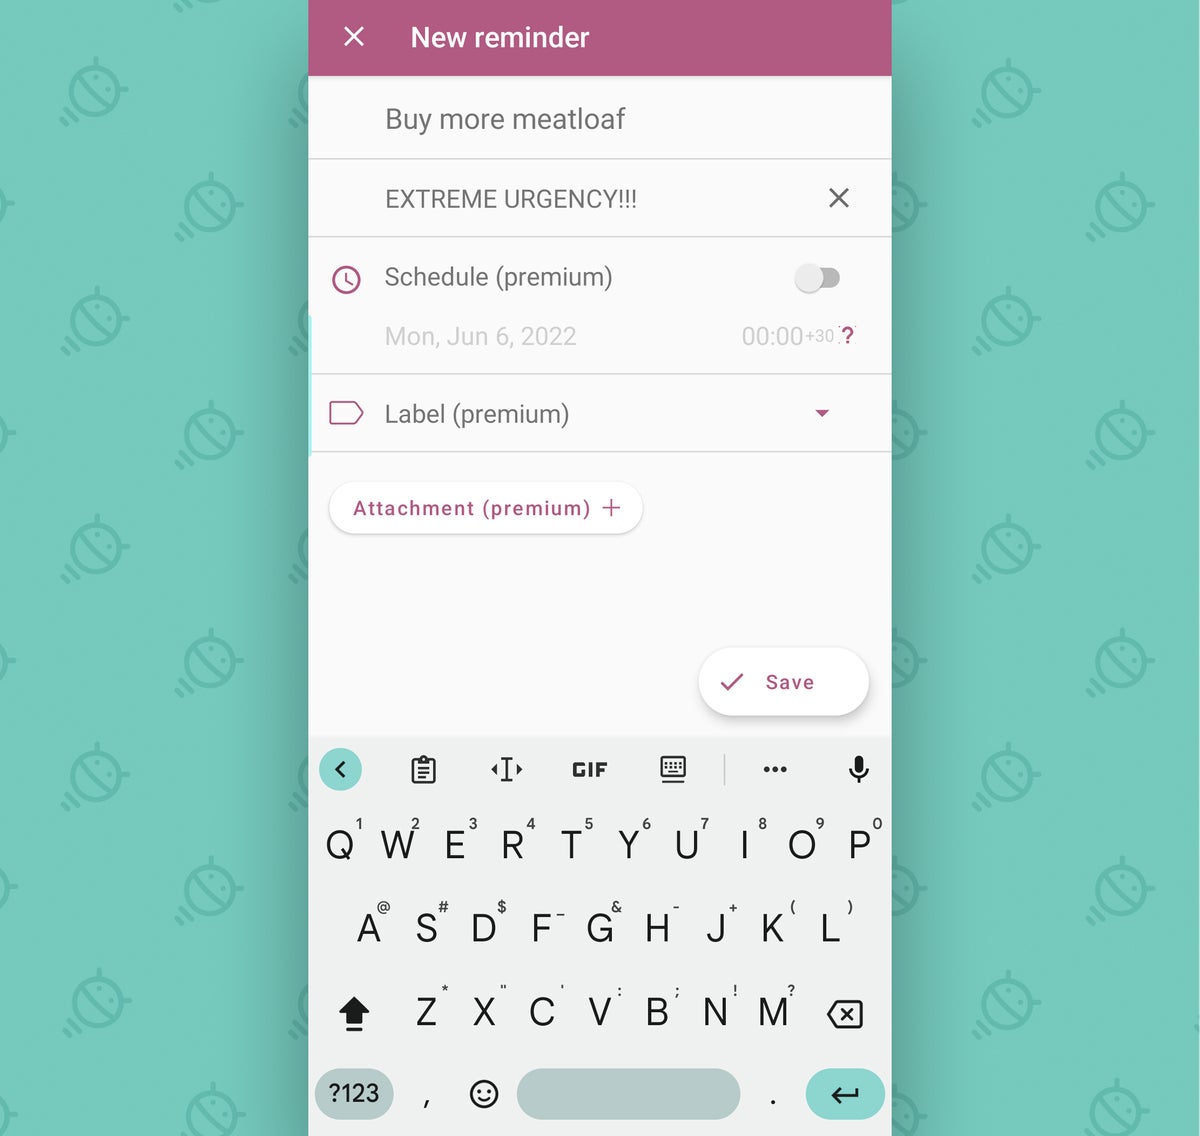
It's an app called InboxIt. Its primary purpose is to give you a simple way to send articles and other web pages you encounter anywhere on your phone straight into your inbox for later reference — and it's incredibly effective at doing that.
But the app has a hidden bonus ability, and it's every bit as handy: It gives you a Quick Settings shortcut for creating your own custom memos and sending 'em directly into your email for later reference.
 JR
JR Oh, yes.
Once you have the app installed, just edit your Android Quick Settings panel (using the same steps we've referenced 7 zillion times now) and look for the “New Reminder” tile in the inactive area. Drag it up or over into an active and visible position, and poof: Your personal memo machine is born.
All that's left is to tap it once and do a test run — 'cause there's a decent chance the first time you use it, the app will prompt you to grant it access to send emails on your behalf (since it couldn't possibly perform this action for you otherwise). And you'll want to get that out of the way before you actually need the function for real.
From that point forward, though, you can simply press your precious fingie onto that Quick Settings shortcut anytime the urge strikes and know that whatever you send will be waiting in your inbox a mere matter of seconds later.
InboxIt is free for its base functions, with an optional $3 upgrade that'll get you a bunch of extra features and opportunities for customization.
And with that, congratulations are officially in order. You've just made your Android phone way more useful — and that, m'dear, is one heck of an accomplishment.
Get six full days of advanced Android knowledge with my free Android Shortcut Supercourse. You'll learn tons of time-saving tricks for your phone!
