
Hey. You. Yes, you there — the one with your overly moist eyeballs pointed at the screen. What if I were to tell you that that the browser you rely on for all of your web-based exploring on Android had oodles of extra features — top-secret settings that'd add awesome powers into your mobile browsing adventures and make wiggling your way around this wacky ol' web of ours meaningfully better?
Well, provided you're using Google's Chrome browser for Android, that's as true as true can be. And best of all, it doesn't take much to uncover all of Chrome's carefully concealed treasures — if you know where to look.
The six settings on this page will make your Android-based web browsing more powerful, more efficient, and generally just more pleasant. They're all just sitting there waiting to be found, too — so really, why not take advantage of what they have to offer?
Before we spelunk any further, though, one quick word of warning: All of these settings are part of Chrome's flags system, which is a home for under-development options that are still actively being worked on and aren't technically intended for mainstream use. The flags system is meant for expert users and other similarly informed (and/or insane) folk who want to get an early look at advanced items. It also evolves pretty regularly, so it's entirely possible some of the settings mentioned here may look different from what I've described or even be gone entirely at some point in the not-so-distant future.
What's more, the flags system has loads of advanced options within it, some of which could potentially cause websites to look weird, Chrome itself to become unstable, or even your ears to start spewing a delightfully minty steam. (Hey, you never know.) So in other words: Proceed with caution, follow my instructions carefully, and don't mess with anything else you encounter in this area of the browser unless you actually understand it and genuinely know what you're doing.
[Psst: Love shortcuts? My Android Shortcut Supercourse will teach you tons of time-saving tricks for your phone. Sign up now for free!]
Got all that? Good. Now, let's give your browser some spiffy new superpowers, shall we?
Chrome Android setting No. 1: Smarter screenshots
I don't know about you, but I share an awful lot of screenshots with my fellow phone-staring land mammals. And often, there'll be some manner of info on the screen I want to highlight — a specific area on a web page, an interface element, a pinky-nail-sized photo of my fibula, or whatever the case may be.
Android's own native screenshot editor makes it easy to scribble on any screenshot you capture and add in a crudely drawn line or circle — but “crudely drawn” is the key term there. You're quite literally just scribbling with your finger on the screen, and you can very much tell in the way it ends up looking.
But, get this: You can now create a tidy and professional-looking box, circle, or arrow on top of any screenshot you capture from right within Chrome, without ever interrupting your workflow. And all you've gotta do is flip a single switch to make it possible.
Here's the trick:
- Type chrome:flags into your Chrome Android app's address bar.
- Type screenshots into the search box on the screen that comes up.
- Tap the line labeled “Screenshots for Android V2” and change its setting from “Disabled” to “Enabled.”
- Tap the blue Relaunch button at the bottom of the screen.
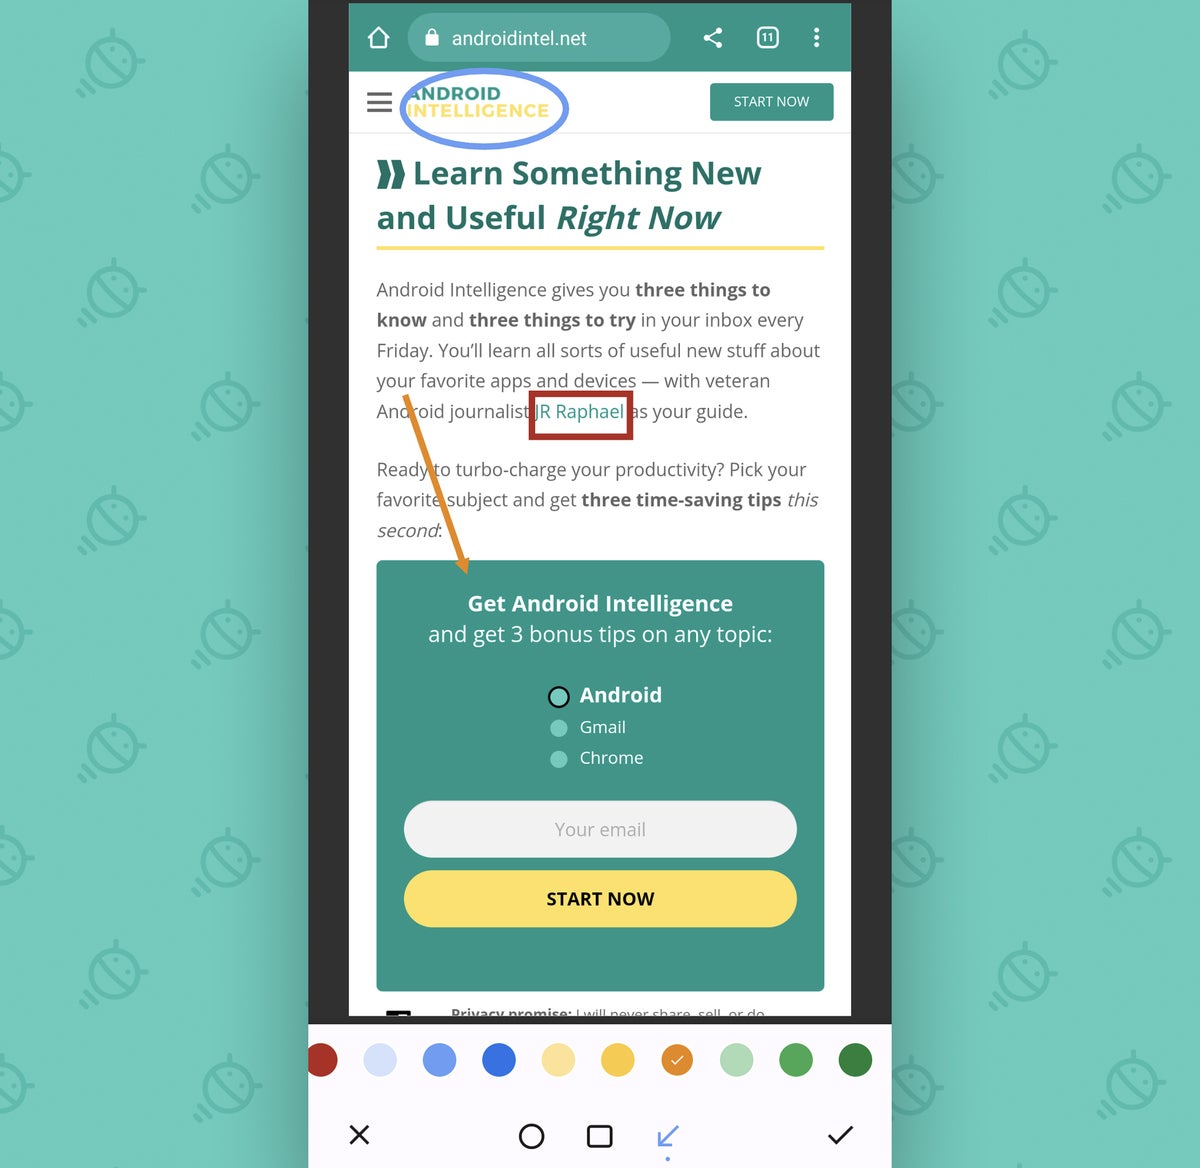
After your browser restarts itself, open up a web page — any ol' web page. Tap the three-dot menu icon in Chrome's upper-right corner, select “Share,” and then select “Screenshot” in the little panel that pops up.
And hey — how 'bout that? There at the bottom of that tool is an innocuous-looking new addition called “Shape.”
 JR
JRTap that, and you can then draw any clean-looking box, circle, or arrow anywhere on the screenshot, in any color you want:
 JR
JRNot too shabby, eh?
Chrome Android setting No. 2: Less limiting screenshots
Speaking of screenshots, have you ever tried to capture a screenshot of something you're viewing in Chrome's Incognito mode on your phone?
If not, allow me to spoil the surprise for you: It doesn't work. You just get a blank, black image without anything visible on it — which is lovely in its simplicity, I suppose, but not all that useful when it comes to trying to share important info.
Well, get this: Deep within Chrome's dankest bowels lies a simple switch that removes that screenshot-prohibiting policy for the browser's Incognito mode and lets you capture anything you want to capture, in any mode you're using.
So say, for instance, you're using Chrome's Incognito mode to look at something without being signed in. Or maybe you're relying on it to check on a certain search without having the term get connected to your Google browsing history. Or maybe you're using it for, erm, certain other undisclosed purposes.
Whatever the case, there are bound to be moments when you want to snap a screenshot of something in that sort of state. And now, you can.
Here's all there is to it:
- Once again, type chrome:flags into your browser's address bar.
- Type incognito into the search box on the screen that comes up.
- Find the line labeled “Incognito Screenshot” and change its setting from “Default” to “Enabled.”
- Tap the Relaunch button at the bottom of the screen.
And that's it: You can now capture screenshots of Incognito windows whenever your privacy-browsing heart desires.
Just remember: If you snap something accidentally at an (ahem) inadvertent moment, it's up to you to go find and delete it.
Chrome Android setting No. 3: Smarter saving
If you're anything like me and tend to keep somewhere between 20 and 20,000 tabs open in your Chrome Android browser at any given moment — all Very Important Articles you intend to read at some point, obviously — this next hidden Chrome feature is just for you.
It's a smarter system for saving stuff directly in your Android browser without all the clutter and then making sure you actually remember to revisit it later.
And this one requires two different pieces of the puzzle to be activated:
- Start by typing chrome:flags into your browser's address bar (feeling familiar yet?).
- Next, type read later into the search box.
- Find the line labeled “Reading list” and change its setting to “Enabled (with app menu item).”
- And then find the line labeled “Read later reminder notification” and change its setting to “Enabled.”
- Finally, tap the Relaunch button at the bottom of the screen.
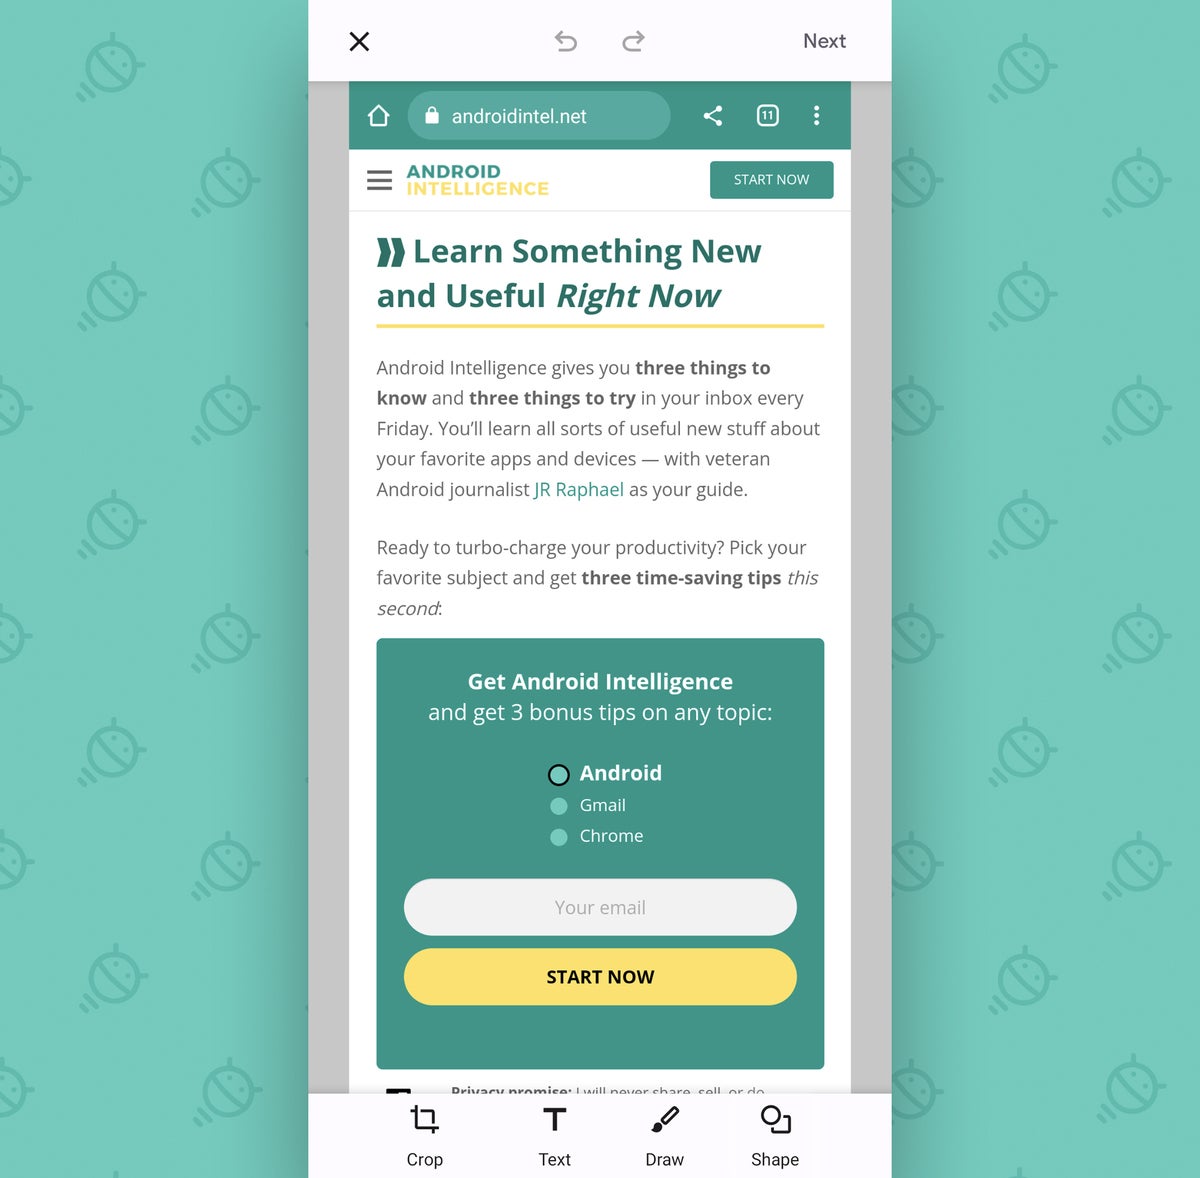
When Chrome reloads, try opening up any article on any website you like. Tap the three-dot menu icon in Chrome's upper-right corner, and you should see a newly added “Add to reading list” option midway down the menu.
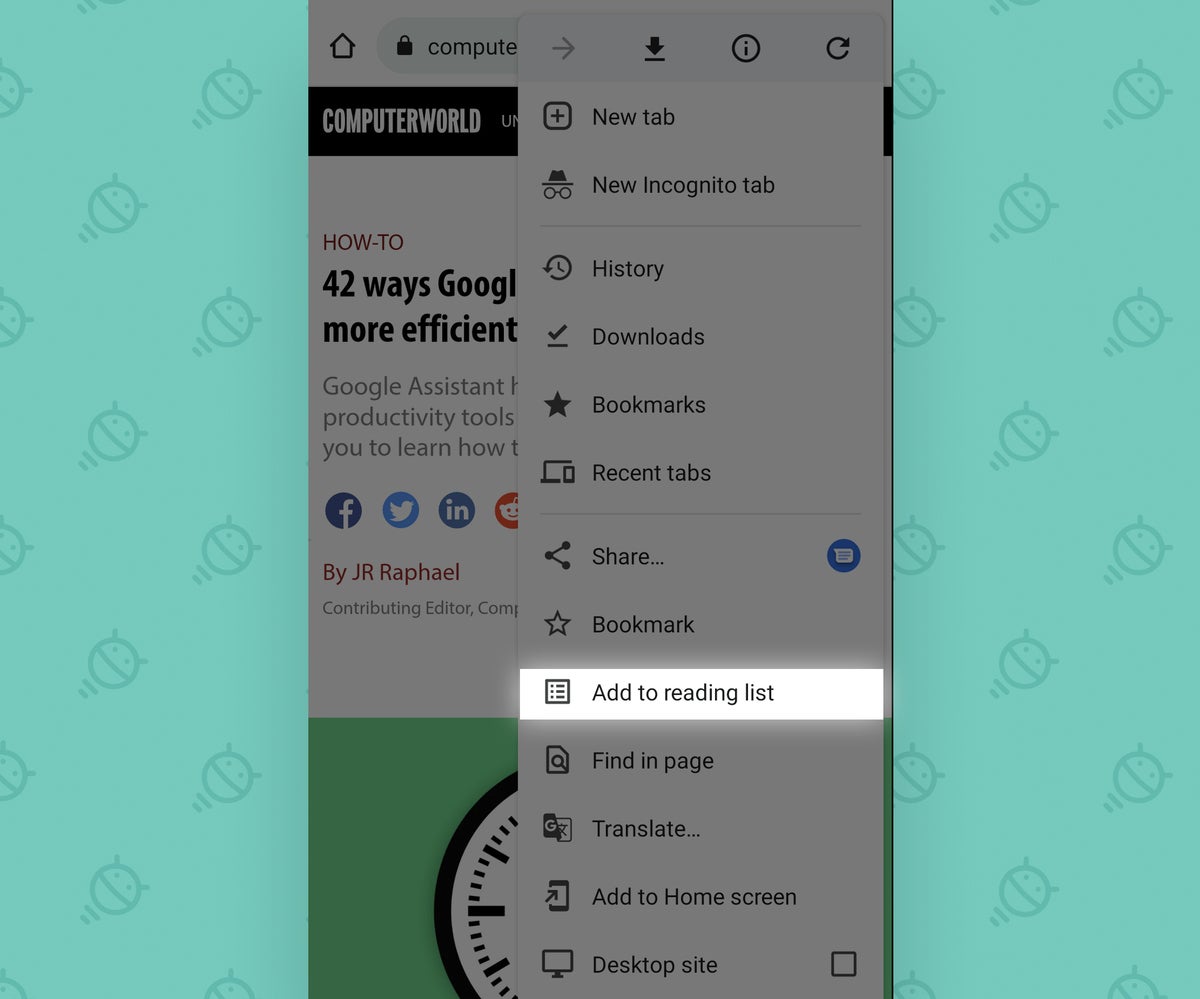 JR
JR Select that, and the page will be beamed over into a special area of your browser's bookmarks reserved explicitly for stuff you want to read later — and you'll get a reminder after a week that you, like, really need to read it.
If you ever want to access your reading list on your own, just tap Chrome's three-dot menu icon again and select “Bookmarks.” You should then see “Reading list” as an option and be able to find everything you've saved within it.
And as an extra-useful bonus, all those articles are automatically made available for offline reading, too, in case you ever want to catch up whilst on an airplane or in an undisclosed underground bunker.
Chrome Android setting No. 4: Better bookmarks
While we're thinking about those Chrome Android bookmarks, let's take a sec to self-apply a major interface upgrade in that area — shall we?
The truth is that it's a pretty overdue improvement. Chrome's bookmarks area on Android hasn't gotten much love in a good long while, and it's looked rather blah (to use the technical term) as a result. But fear not, for Google hasn't forgotten about it entirely.
You can fast-track your Android phone into Chrome's new-and-improved bookmarks setup by making this quick ‘n' easy tweak:
- Type chrome:flags into the browser's address bar.
- Type bookmarks into the search box on the screen that comes up.
- Tap the line labeled “Bookmarks refresh” and change its setting from “Disabled” to “Enabled (enabled w/ visuals).”
- Tap the Relaunch button at the bottom of the screen.
After your browser restarts, tap the three-dot menu icon in its upper-right corner and again tap “Bookmarks” in that main Chrome menu. You'll be greeted with a freshened-up Android bookmark view that doesn't look like it was last touched in the prehistoric ages — and, as an added perk, you'll also notice a new and less ambiguous option for adding a site into your bookmarks within that main Chrome menu.
Chrome Android setting No. 5: A smarter Dark Theme
Android's Dark Theme is a nice way to make your virtual world a little easier on your eyes, especially in the evening hours or anytime you're in a dim setting (like, for instance, an undisclosed underground bunker).
But oddly enough, using the system-wide Dark Theme toggle doesn't actually affect the web. Most sites still show up bright as day and in a harsh contrast to the mellow dim vibes the rest of Android gives you in that context.
Well, here's the fix:
- Type — yup, you guessed it! — chrome:flags into your browser's address bar.
- Now type dark into the search box on the screen that comes up.
- Find the line that says “Darken websites checkbox in themes setting” and change its setting to “Enabled.”
- Smack that splendid Relaunch button at the bottom of the screen. (Don't worry. It likes it.)
Now pull up any ol' website you want, and you'll see the site magically transformed into a dark theme for your viewing pleasure.
 JR
JR And remember this: If you ever want to disable that transformation, you can mosey your way into the Chrome Android app's settings and select “Theme” to find a switch that'll let you toggle it on or off as needed.
Chrome Android setting No. 6: Richer reactions
Last but not least is a slightly silly but still potentially useful Chrome Android option. And it goes hand in hand with the first two tricks we went over at the start of this saga.
Are you ready? This final hurrah of ours is an expanded system for browser-based screenshots — one that makes it delightfully easy to add an expressive reaction into any image you capture for extra effect.
See?
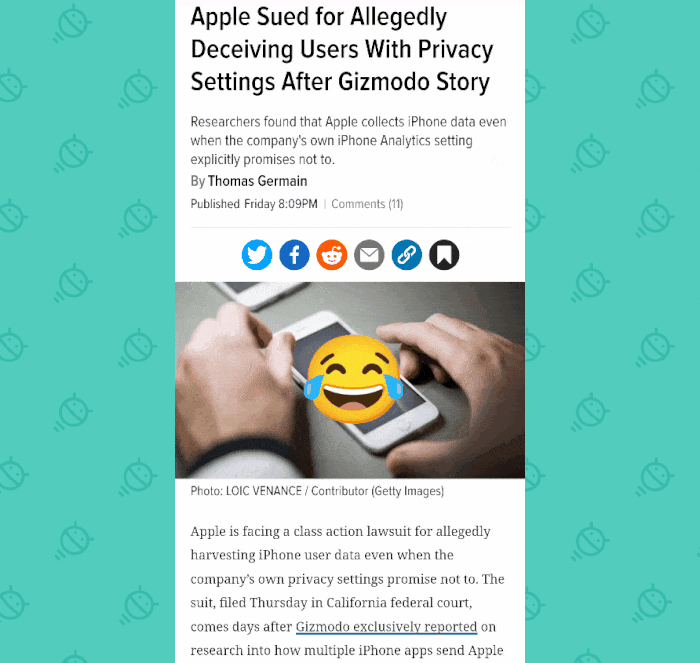 JR
JRWant to give it a whirl? Here's how:
- One last time, type chrome:flags into that eager and waiting address bar of yours.
- Type reactions into the search box at the top of the screen.
- Find the line labeled “Lightweight Reactions (Android)” and change its setting to “Enabled.”
- Last but not least — let's all say it together now! — tap the Relaunch button at the bottom of the screen.
When Chrome comes back up, just gallop over to any ol' website you like, select the “Share” option in the main Chrome menu, and look for the newly present “Add emotion” possibility.
Pound that puppy, then pick the emotion you require (and note that you can scroll horizontally on the list of options to uncover even more symbols) — then use your fingers to move and resize it and even duplicate it, if you're really feeling merry.
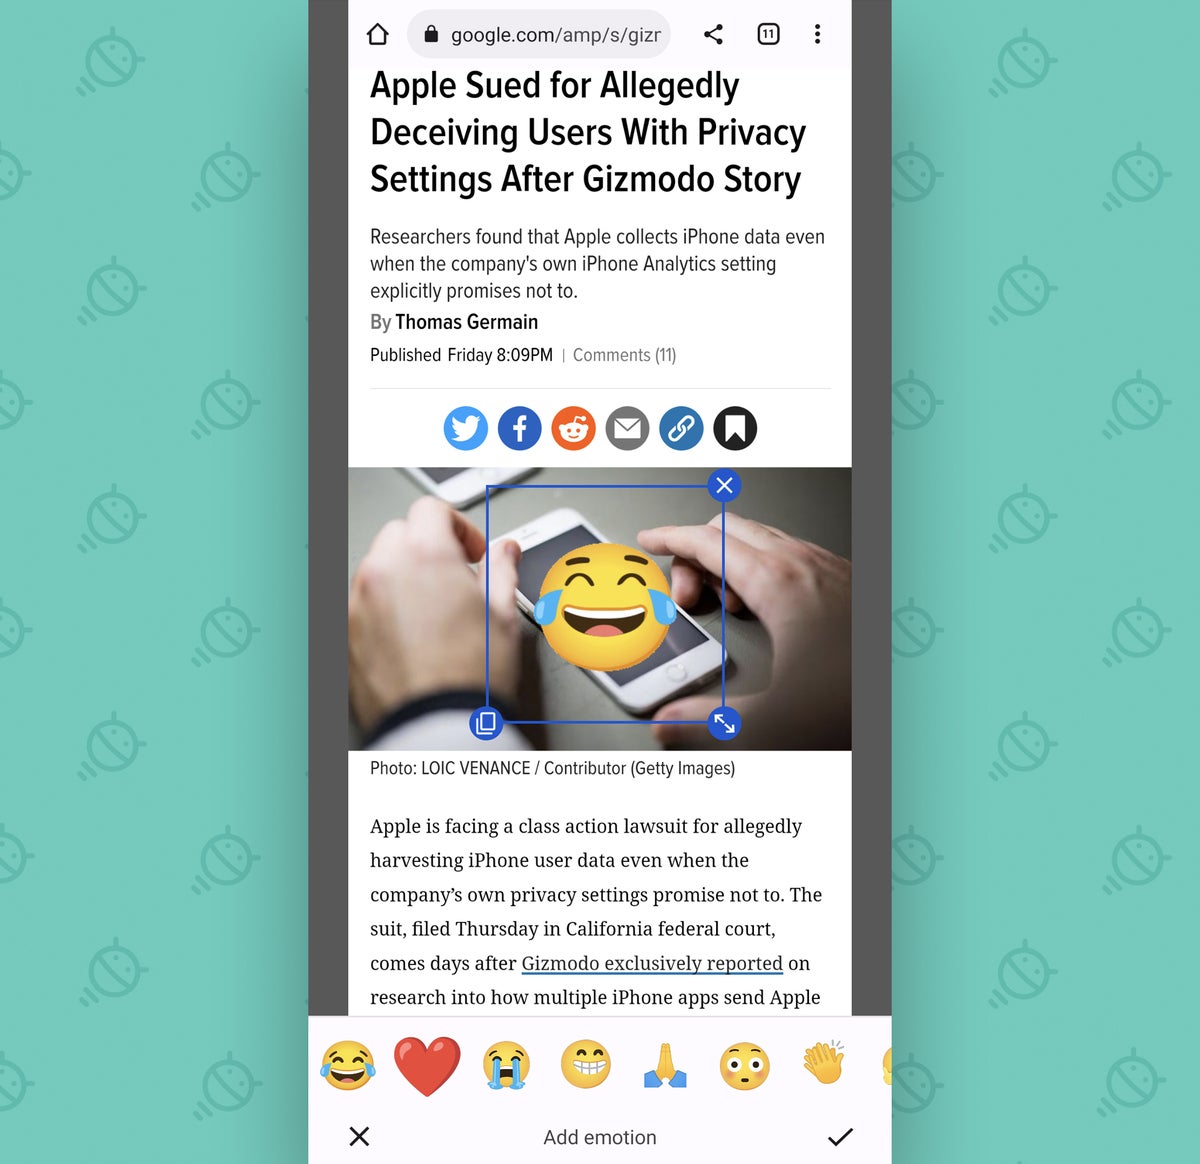 JR
JRAll that's left is to hit the checkmark icon in the lower-right corner of your screen and then send your creation as a lively animation to whatever colleague you choose to bless with your expressiveness.
For everyone else in your workplace, simultaneously: You're welcome — and I'm sorry.
Ready for even more advanced Android knowledge? Sign up for my free Android Shortcut Supercourse to learn tons of time-saving tricks!
