
A note-taking app can be helpful, especially if it enables you and your co-workers to collaborate on ideas. Microsoft OneNote is an excellent tool for the job. It’s pre-installed on Windows 10 and 11 and is included with a Microsoft 365 subscription. But anyone can download the app and use it for free.
This guide walks you through the basics of using OneNote, focusing on OneNote for Windows 10, the version that comes with Windows 10 and 11 and that’s available for download in the Microsoft Store. Other available versions include a more fully featured Windows desktop app, a web app, and apps for macOS, iOS, iPadOS, and Android. These may look or function a little differently than described here, but the basic functionality is similar. This guide will describe notable differences in the features and interfaces of the web and mobile apps that will be helpful for you to know.
Get started with OneNote
OneNote uses Microsoft OneDrive (or OneDrive for Business) to sync the notes you create to the cloud, so your notes are always up to date across all your devices. Thus, the app requires that you sign in with a Microsoft user account. If your company uses Outlook or you have a free webmail account on Outlook.com, for example, you already have a Microsoft user account. If not, you can sign up for one for free.
To understand how to work in OneNote, it’s helpful to first know its organizational structure:
- A Microsoft user account can contain multiple notebooks.
- Each notebook can contain multiple sections.
- Each section can contain multiple pages. (OneNote refers to an individual note as a “page.”)
This organizational structure is reflected in how OneNote’s home layout is presented. When you launch OneNote, maximize its window so that it fills your PC’s display. On the vertical toolbar along the left, click the Show/Hide Navigation button. (It’s above the magnifying glass icon.) OneNote will arrange its layout like so:
- Along the left is a toolbar with the Show/Hide Navigation icon at its top. Clicking the magnifying glass button opens a search pane, and clicking the clock shows recent notes.
- To the immediate right of the Show/Hide Navigation icon is the name of the currently opened notebook, and there are two columns below this notebook’s name: The first column lists sections and the second lists pages that are contained in this notebook.
- The right half of the OneNote window shows the currently selected page.
 IDG
IDGOneNote shows notebooks, sections, and pages in the left columns, with the current page showing in the main window area. (Click image to enlarge it.)
Clicking a section name will show in the column to its right a list of the pages under this section. And clicking the name of a page opens the page in the large pane to its right, where you can then view the page’s contents, scroll through it, and edit it.
When you click the Show/Hide Navigation button, the currently viewed page will become bigger, and the column listing the sections and pages will be removed. Click the Show/Hide Navigation button again, and this column will return.
Along the top of the OneNote window, clicking View will open a toolbar that allows for other ways to view a page, such as zooming in or out, or launching the page in a new window.
The first time you launch OneNote, there won’t be any sections or pages, but it does create a new notebook for you to start with.
Note that there’s no Save command in OneNote; everything you do is saved automatically.
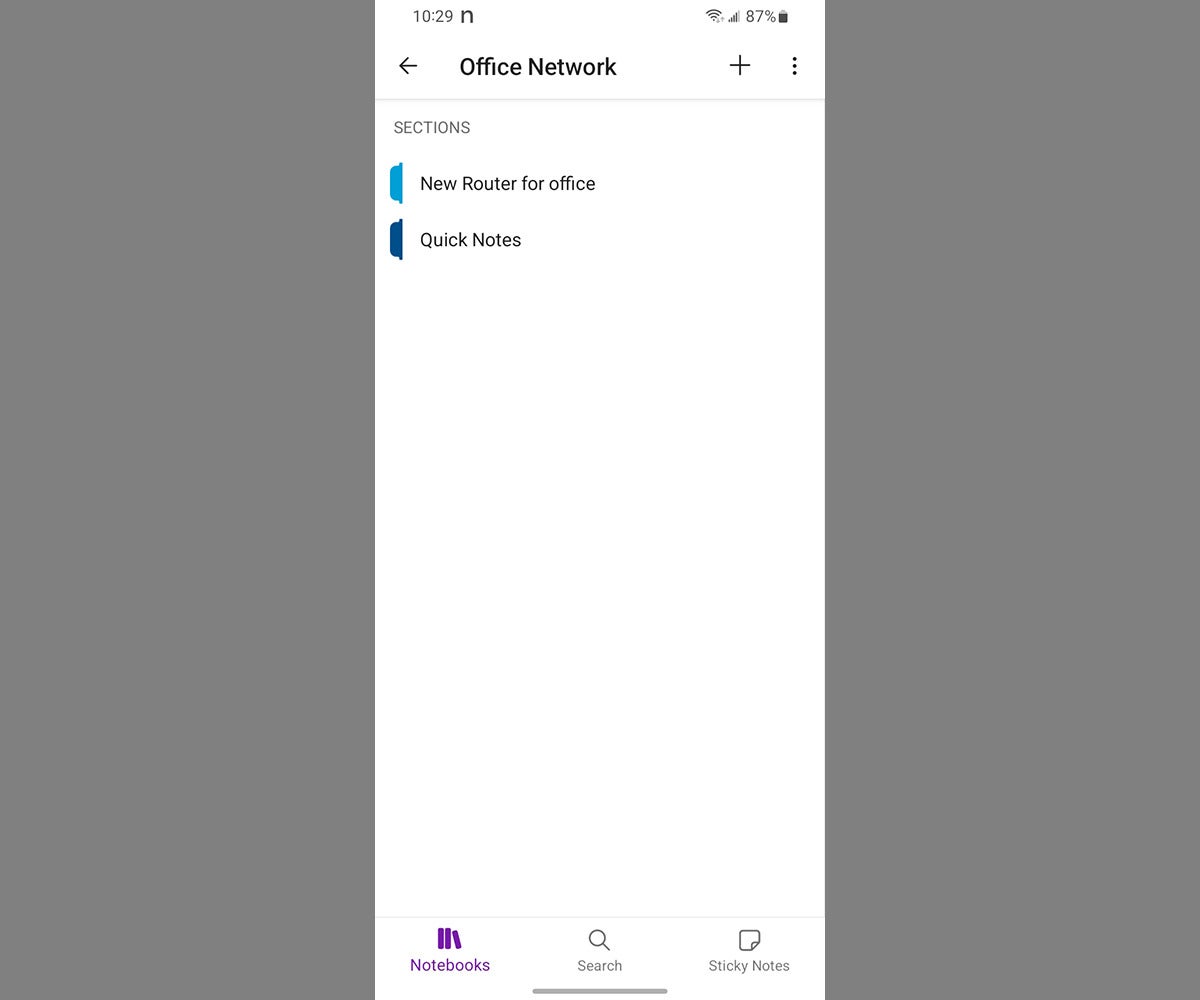
In the OneNote mobile app: To see the list of notebooks on your account, tap the Notebooks icon at the lower left. Tap a notebook to open it. The screen will switch to another screen that lists the sections in the notebook.
Tap a section to open it. The screen will switch to another screen that lists the pages that are under it. Tap a page to open it. You can scroll throughout the page.
 IDG
IDGThe OneNote Android app showing a notebook’s sections.
Create notebooks, sections, and pages
When you create a new notebook, section, or page, you’ll be prompted to type in a name for it.
Create a new section or page: At the bottom of the second column, click Add section or Add page.
Create a new notebook: Click the name of the notebook that’s currently open in OneNote. (This name is to the immediate right of the Show/Hide Navigation button.) At the bottom of the Notebooks pane that opens, click Add notebook.
 IDG
IDGClick Add notebook at bottom left to create a new notebook.
Switch to another notebook: Click the name of the currently opened notebook to open the Notebooks pane. Any other notebooks associated with your account will be listed on this pane. Click the one you want to switch to.
In the OneNote mobile app: To create a new notebook or section, go to the screen that lists notebooks or sections, tap the + icon on the upper right, and enter a name for the new notebook or section.
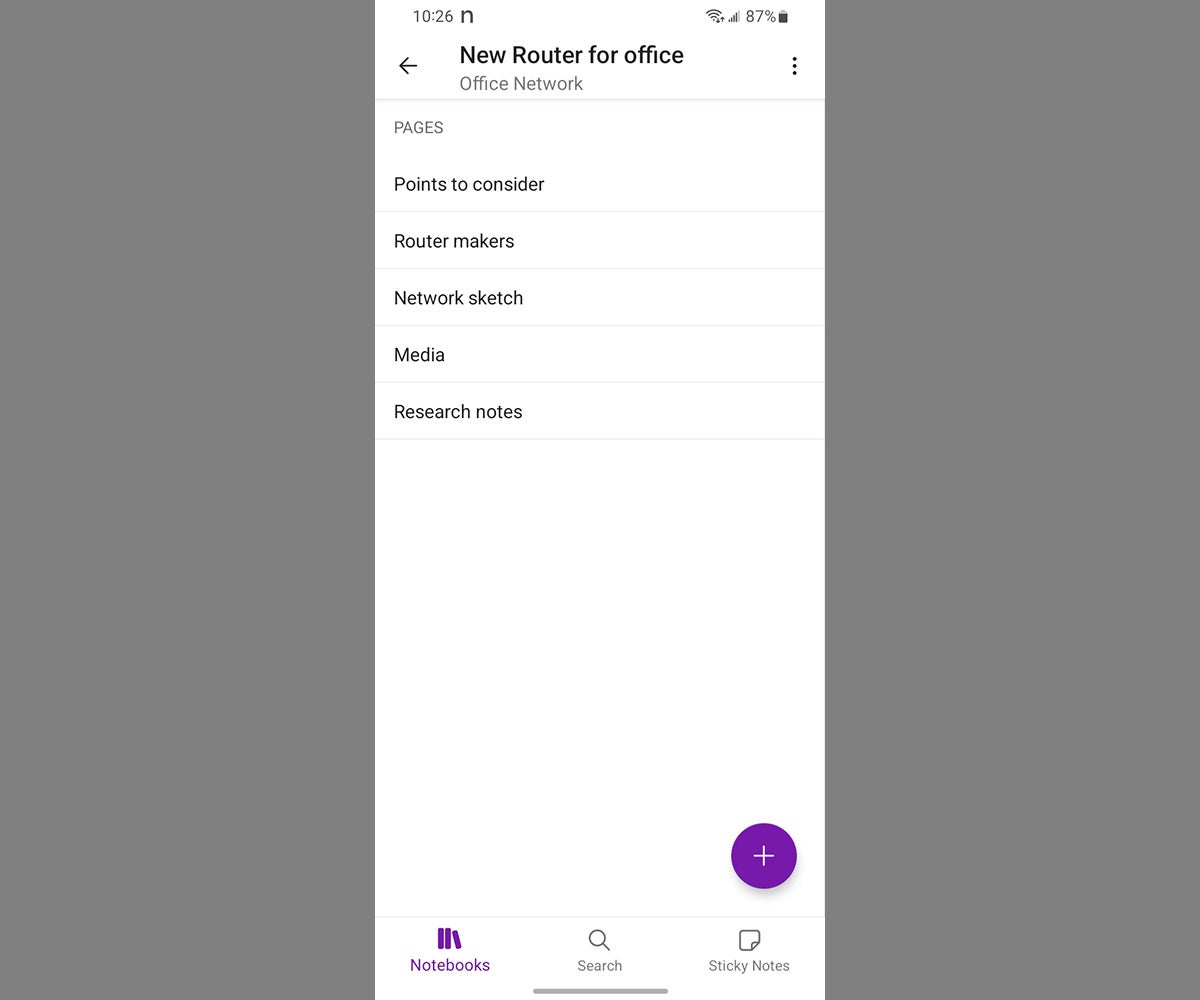
To create a new page, go to the screen that lists pages and tap the + icon on the lower right. This action will open a new page on the next screen.
 IDG
IDGClick the + icon at lower right to create a new page. (A page is the same thing as a note.)
Work with frames on a page
When you start typing anywhere in the body of a page, a frame appears around it. The more lines of text you enter, the taller this frame becomes. You can adjust the width of the frame by dragging its right border line. You can move the frame to another spot on the page by clicking, holding, and dragging its top border line.
 IDG
IDGA frame appears around text you type on a note.
When you click on another area of the page, the frame around the text disappears, leaving behind the text inside it. When you click on the text again, the frame around it reappears.
This framing interface lets you create groups of text that you can move around on a page. You can even move one text group over another text group — the one on top will become transparent over the second. This gives OneNote pages more flexibility than you get with the typical left-to-right, top-to-bottom approach of many note-taking and word-processing apps.
 IDG
IDGYou can move each group of text in its frame.
Format and tag text
OneNote for Windows 10 uses a simplified version of the Office Ribbon running across the top of the screen. It’s divided into tabs where you can access different toolbars with commands for formatting text, inserting images and other elements, changing a note’s design, and more.
You can change several aspects of text using the Home tab’s toolbar. If it’s not open already, click Home to open this toolbar.
Change text formatting: Highlight the text in a frame on a page. Then, from the Home toolbar above, select a formatting function such as font name, size, highlight color, or text color.
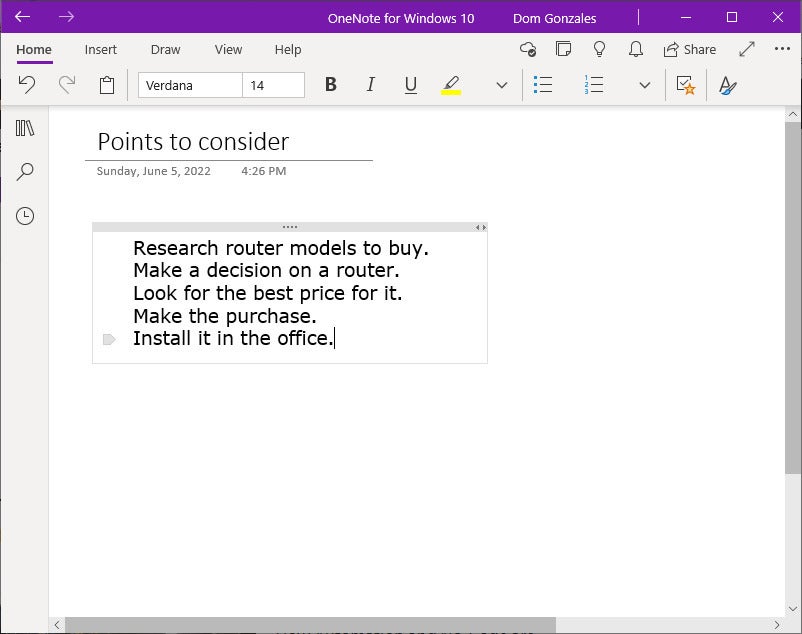
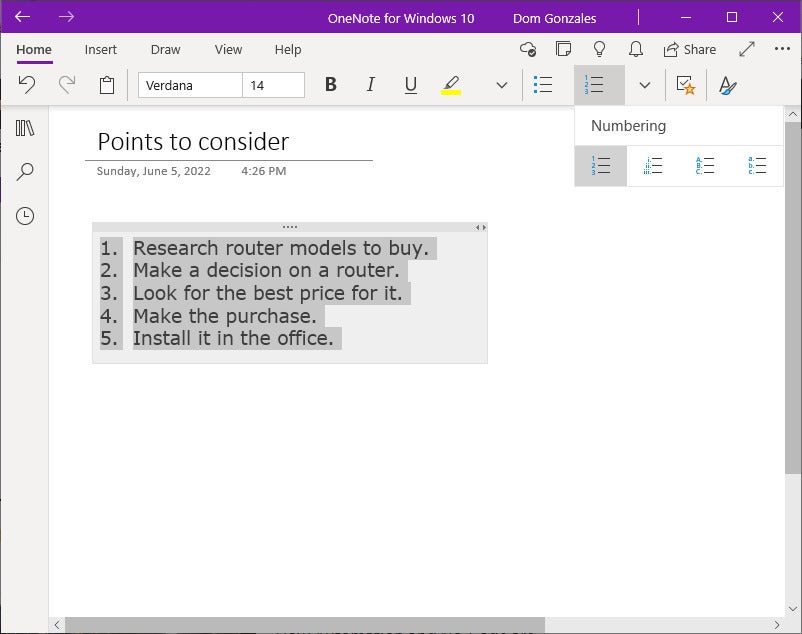
You can also format lines of text to be a bulleted or numbered list. A bullet icon or number will be added to the left of the first line of text you type. Thereafter when you press the Enter key, the next line will also be preceded with a bullet or the next sequential number.
 IDG
IDGFormatting text as a numbered list.
Tag a line of text: Put the cursor in the line of text. On the Home toolbar, click the downward arrow to the right of the Tags button (a box with a checkmark and a star). From the dropdown menu that opens, select the tag that you want applied to this line of text.
This puts an icon at the beginning of the line of text, such as a checkbox for “To Do” or a star icon for “Important.” You can also create a new tag name and select an icon for it.
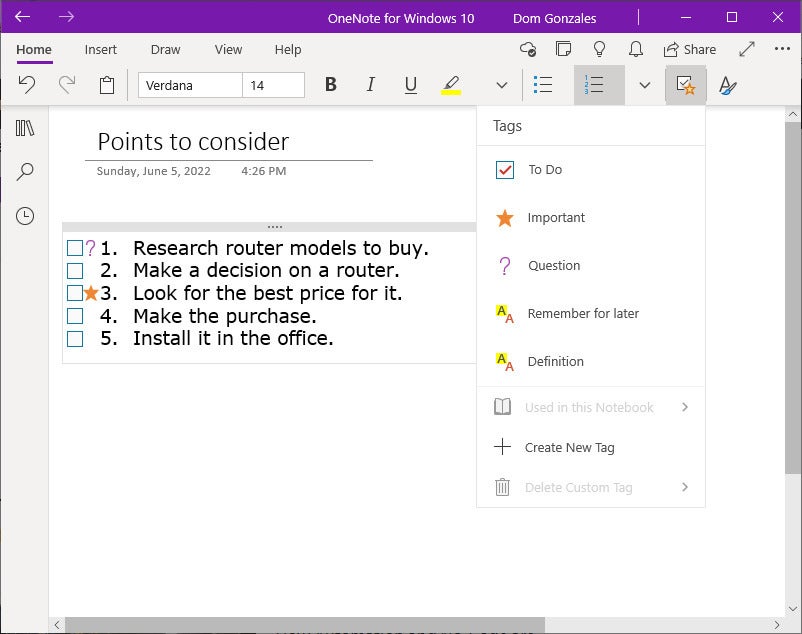 IDG
IDGYou can enhance text with interactive checkboxes or other icons.
The checkbox that designates a line of text as a To Do item is interactive. Clicking the small box will mark it with a check.
In the OneNote web app: You’ll find several more preset tag types.
In the OneNote mobile app: To add text to a page, tap the spot on the page where you want to put it. The on-screen keyboard of your phone or tablet will open with a toolbar along the top of the keyboard. Icons on the toolbar let you insert To Do, bulleted, or numbered lists; format text in various ways; embed selected text with a web link; or insert other elements described later in this story.
 IDG
IDGFormatting text in a note in the OneNote Android app.
Add images, media, and other elements
To add images, tables, video, and other elements to a page, place your cursor at the spot on the page where you want the element to appear and click the Insert tab at the top of the OneNote window.
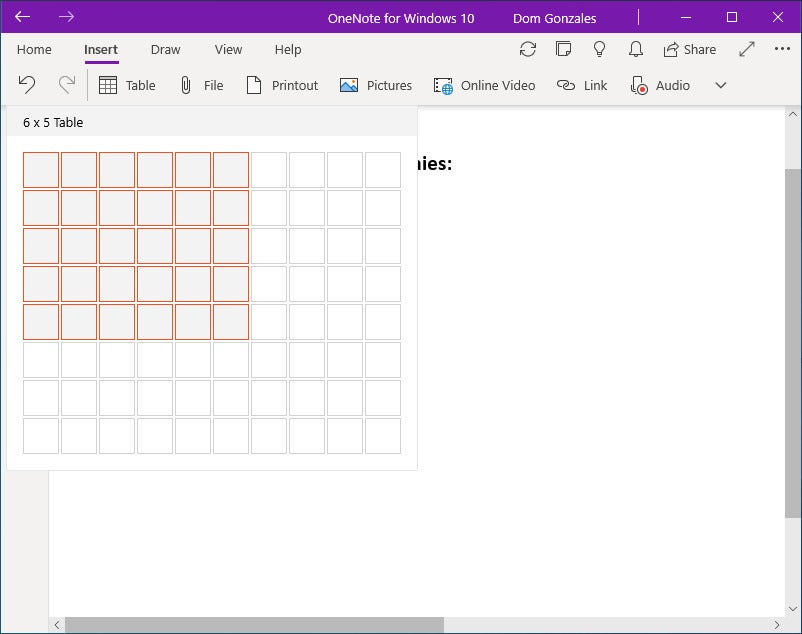 IDG
IDGAdding a table to a note.
The toolbar that appears lets you insert the following items:
Table: Clicking this button opens a panel that lets you select the number of columns and rows you want for a new table by dragging the pointer.
You can adjust the width of a table by clicking on and dragging the right side of its frame. You can move the table itself to another area on the page by clicking on and dragging the top side of its frame. To adjust the sizing of the columns of the table, click on and drag the vertical lines inside the table.
Inside each cell of the table, you can type text or numbers, and even add a picture, as described later.
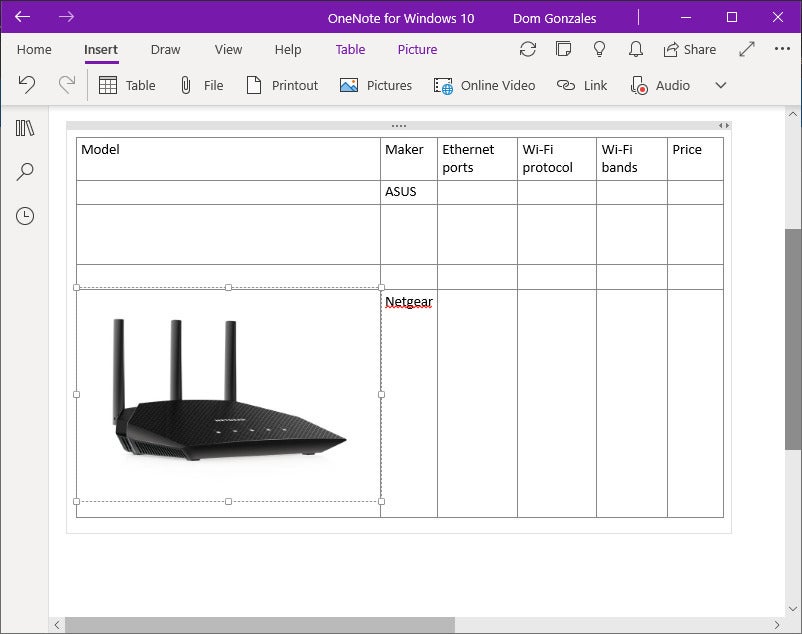 IDG
IDGA table can contain text, images, and more.
File: Clicking this button opens File Explorer. You can select a file on your PC’s drive or OneDrive.
When you insert a file, it appears as a shortcut on the page. If it’s a shortcut to an .EXE file, clicking it will run the program on your PC. Otherwise, clicking the shortcut will load it inside a corresponding app. For example, if it’s a .DOCX or .DOC file, the document will launch and load inside Microsoft Word. Clicking a shortcut to an audio or video file will launch your PC’s default media player.
Printout: Clicking this button also opens File Explorer. You select a PDF on your PC’s drive or OneDrive. All of the PDF’s pages will be added to the page as a series of images. When you click any of these images, eight dots appear at its sides and corners. You can click on and drag these dots to resize the image.
Pictures: Clicking this button presents you with three ways to add a picture to a page:
- From File lets you select an image file on your PC’s drive or OneDrive.
- From Camera lets you snap a photo using your PC’s webcam.
- From Online lets you add an image that you find via Microsoft’s Bing search engine.
 IDG
IDGAdding a picture to a note.
Remember that the image will appear wherever your cursor is on the page when you click the Pictures button. That means you can click inside a text frame or table cell to have the image appear there.
When you click any image that’s been added to a page, eight dots appear at its sides and corners. You can click on and drag these dots to resize the image.
Online Video: This lets you enter the link to an online video on a site such as Giphy, Vimeo, or YouTube. A thumbnail of the video will be added to the page. When you click the thumbnail, the video will play. You can resize this thumbnail like any other image, as described above.
Link: You can apply a clickable web link to a word or words on the page. First, copy the web link to your Windows clipboard. Next, highlight the word or words on the page. Then click the Link button, and on the panel that opens, paste in the web link.
Audio: A simple audio recording and playback tool will appear along the top of the OneNote window when you click this button. You can record a voice memo if your Windows PC has a microphone. The recording will appear on the page as a shortcut to an audio file.
Meeting Details: Clicking this button will let you insert meeting details from your Outlook calendar, including time, date, place, and attendees. There’s also a place for you to add notes from the meeting. (If you don’t see the button, click the down arrow icon at the right end of the Insert toolbar and select Meeting Details from the dropdown menu.)
 IDG
IDGInserting meeting details from Outlook into a note.
In the OneNote mobile app: To add images or other elements to a page, tap the spot on the page where you want to put this item. As mentioned in the previous section of the story, the on-screen keyboard of your phone or tablet will open with a toolbar along the top of the keyboard.
In addition to the text formatting options described above, you can click the camera icon to insert a picture taken with your device’s camera or one that’s already stored on it, click the microphone icon to record a voice clip using your device’s microphone, or click the paperclip icon to attach a file that’s stored on your device.
