
When it was first released in July 2015, Windows 10 was the best operating system to come along from Microsoft in a long time. A shape-shifter that changed its interface depending upon whether you were using a traditional computer or a touch-based one, it undid the damage wrought by Windows 8, including eliminating the awkward Charms bar and bringing back the long-mourned Start menu.
Windows 10 introduced many other key features as well, including the Edge browser, the Cortana digital assistant, links to Microsoft’s cloud-based OneDrive cloud storage service, and plenty more.
That’s not to say that Microsoft got everything right out of the gate. The company has honed those features, added new ones, and scrapped some that didn’t work out as it rolled out 11 major updates to Windows 10 since its initial release. This story is based on the Windows 10 November 2021 Update (version 21H2), so the features described here and the screenshots you see may differ from what you see if you have an older version of Windows 10. I'll cover everything you need to know, and I've also provided quick-reference charts listing useful keyboard shortcuts, touchscreen gestures, and touchpad gestures.
Note: If you want to get the most out of Windows 10, you'll have to use a Microsoft ID as your user account. Without a Microsoft ID, you won't be able to use a number of Windows 10 apps or sync settings among multiple devices. So when you set up Windows 10 for the first time, sign in with an existing Microsoft ID or create a new one.
Before I get started, a few words about some terminology you'll need to know. Microsoft has sowed enormous confusion with a set of lightweight apps that were originally designed for the Windows 8 touch-oriented Start screen interface. It first called them Metro apps, and then through the years changed their names to Modern apps, Windows Store apps, and then Universal Windows apps. Now it's settled simply on Windows apps, although at times the company also calls them Universal Windows apps. In this article, I'll refer to them as Windows apps.
What about apps designed for the desktop? Microsoft now calls them Windows desktop applications. In this article I'll call them desktop applications for simplicity's sake.
The Start menu
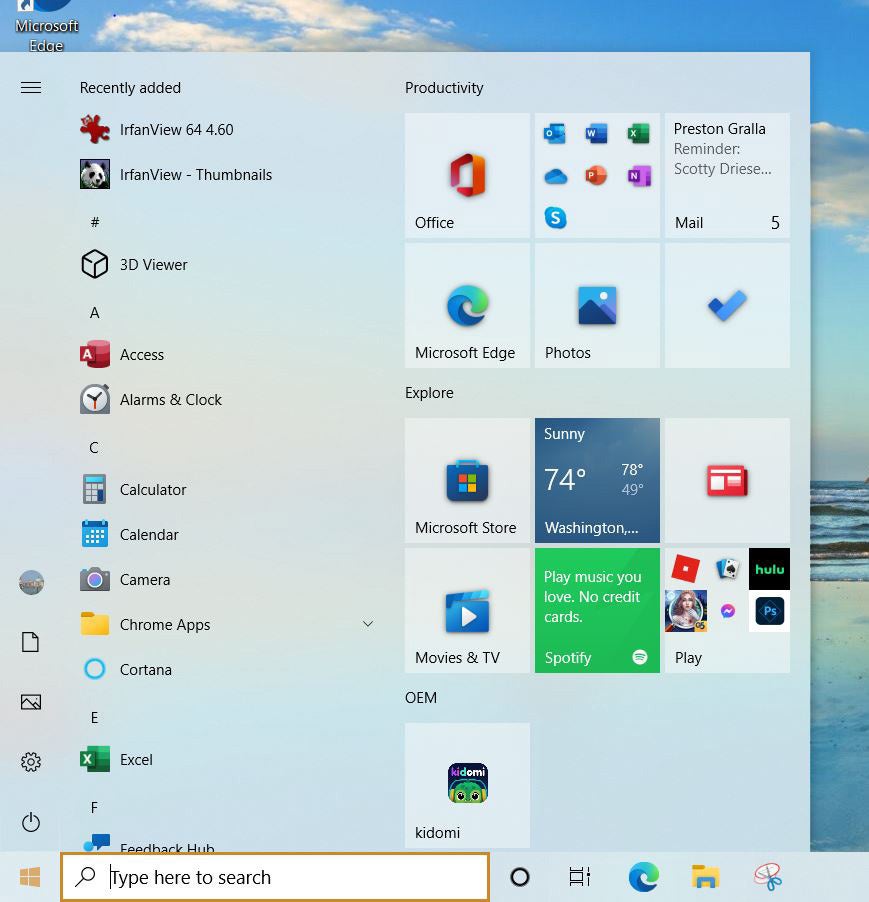
The loudest complaint that desktop users had about Windows 8 was the death of the Start menu. In Windows 10 it's back with a vengeance. When you use Windows 10 on a desktop or laptop, you boot directly into the desktop. Click the Start button at the lower left of the desktop to bring up the Start menu — command central for traditional PC users. (Those who use Windows 10 on a tablet will instead see a Start screen; more on that later in the story.)
 IDG
IDGThe Start menu is command central for Windows 10. (Click any image in this story to enlarge it.)
The menu is divided into two sections. Down its left side you'll find the following:
All Apps: Up at the top left of the screen is a “hamburger menu” (three parallel horizontal lines) that when clicked is a toggle for turning on or off a list of all Windows apps and desktop applications. (By default, the list is turned on.) At the very top of the All Apps list you’ll find apps you’ve recently installed. Just beneath that are all the apps and applications on your PC, in alphabetical order. Click any app to run it.
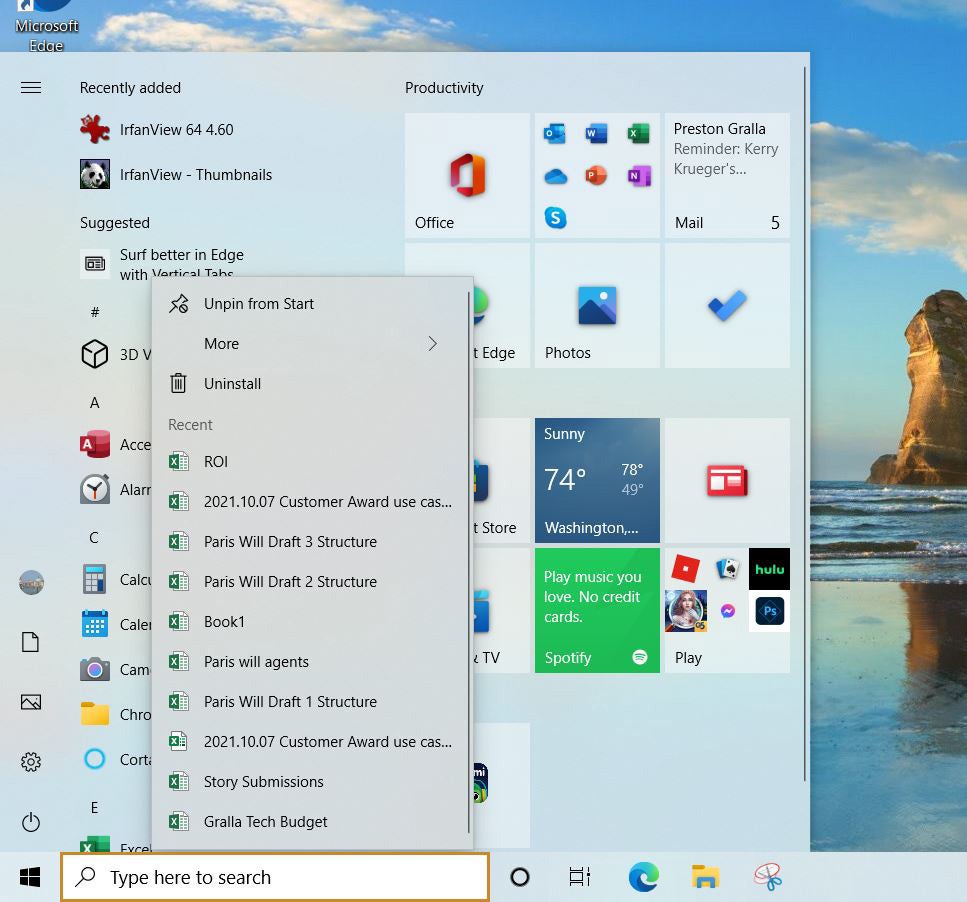
Right-click any app and you’ll see a list of the files you’ve recently opened in it. Click the file to open the application or app, with the file loaded into it.
 IDG
IDGThe jump list for Excel shows the files you’ve recently opened.
In some cases you’ll see a folder with a down arrow next to it rather than an icon. That means there are several options there — for example, to run the Dropbox app or visit the Dropbox website. Click the folder to show all the options, then click the option you want to run. (Also note that in some instances, there will be a folder, but when you click it, you only get one option, to run the app or application.)
Account: Down toward the bottom left of the screen is a set of stacked icons, starting with an icon for your user account. Click it to sign out of Windows, lock your PC, or change your account settings. When you choose to change your account settings, you'll be sent to a screen that lets you change your account picture, your password, and a variety of other settings.
Documents, Pictures, Settings, Power: These icons at the bottom left of the Start menu are no mystery: Documents opens the Documents folder using File Explorer; Pictures opens the Pictures folder using File Explorer; Settings brings you to the Windows Settings app (more on that later); and Power lets you put your PC to sleep, shut it down, or restart it. Click any icon to run it.
If you’re confused about which icons are for Account, Documents, Pictures, Settings, and Power, just hover your mouse over any of them. The icons disappear and are replaced by text labels.
The right side of the Start menu has tiles for Windows apps and desktop applications. Click any tile to run the app associated with it. They're grouped into categories including Productivity and Explore, and then, if you have more apps than fit in those two, they're grouped into unnamed categories below that. New tiles will be added to the unnamed groups as you install new apps and desktop applications.
(Note that if you’re using an enterprise edition of Windows 10, your IT department may have configured other groupings, such as productivity applications or support tools, to appear on the right side of the Start menu. In some instances, your PC manufacturer may add its own categories. For example, on my Evoo laptop, there is an OEM category — not a particularly intelligent use of branding, it must be admitted.)
Some tiles are “live” — that is, real-time information gets piped into them. So the Mail tile, for example, shows your latest email, the Weather shows the weather and so on. Only Windows apps have live tiles. Desktop applications, such as Microsoft Office, don't. Each group of tiles is three columns wide, with most tiles taking up one column by default.
The Start menu is highly customizable. To change its height, hover your cursor over its top edge until a two-headed arrow appears, then drag it up or down to expand or shrink it. On some Windows 10 installations you can do the same thing at the right edge of the menu to expand it to the right or shrink it back again, although this doesn't work for everybody.
To rename a group of tiles, click the group name and type in a new name for it. You can also move tiles around the Start menu by dragging them from one group to another, or, to create a new group, drag tiles to a blank area on the menu. You can name any unnamed group by clicking on the blank area above it and typing in a name.
You can also widen the groups in the Start menu so that tiles take up four columns rather than three. To do it, from the Start menu select Settings > Personalization > Start, and in the “Show more tiles on Start” setting, move the slider to On. The tiles will now take up four columns, but to take advantage of the extra space you’ll have to manually drag tiles to the fourth column.
You can personalize many other aspects of the Start menu from this Settings page, including whether to show your most used apps at the top of the All Apps list, have the Start screen run full screen, and more.
When you right-click a tile, a menu pops up. Here's where things get a bit confusing, because not every Windows app and desktop application has the same pop-up menu, and depending on your installation you might have to click More to see some of these options. Most have some combination of these choices:
Unpin from Start: Select this and the tile vanishes from the Start menu.
Resize: As you would expect, this lets you resize the tile. You can choose Small, Medium, or Large, and some tiles also have a Wide choice that makes it span two columns in its group.
Turn live tile off: This stops real-time information from streaming into the tile. If it's already off, you'll get a Turn live tile on choice.
Pin to taskbar: As it says, this pins the app to the taskbar. If it's already pinned, you'll get an Unpin from taskbar choice.
App settings: This leads to a screen that lets you change the app’s settings, such as whether to allow it to run in the background or get access to your microphone.
Uninstall: This uninstalls the app. Some Windows apps created by Microsoft, such as Skype and Solitaire, can't be uninstalled. However, over time, Windows 10 has let you uninstall more built-in apps than previously, including Mail, Calendar, Sticky Notes, and others.
Rate and review: This option is available only for apps downloaded from the Microsoft Store. It brings you to a page that lets you rate the app on a one-to-five-star basis and write a review. The rating and review appear in the app’s description in the Microsoft Store.
Share: This lets you share a link to the app using a variety of methods, including email, Twitter, and others.
Run as an administrator: This lets you run the app or application as an administrator.
Open file location: Opens File Explorer to the folder where the application lives.
Some Windows apps have other choices as well, depending on their purposes. For example, right-click the This PC app and you get choices such as mapping or unmapping a network drive.
If you’ve enabled the “Most used” list of apps on the left side of the Start menu, you can right-click the icons for these apps as well as the File Explorer, Settings, and Power icons underneath them. Windows apps and desktop applications on the “Most used” app menu typically have similar choices to those already outlined (with some hidden under the “More” submenu). In addition, you might find these options:
Pin to Start: This moves the app from the “Most used” list to the right side of the Start menu.
Run as a different user: This lets you run the app as someone other than the person currently logged in.
Don't show in this list: Takes the app off the “Most used” list.
Cortana and Windows search
Windows 10 brought Microsoft's Siri-like digital assistant Cortana to computers. (It was first introduced on Windows Phones in 2014.) Through the years, Cortana has gone through significant changes on Windows 10. At first, it became closely integrated with Windows Search, and its results appeared in the Search box. It also was given a considerable amount of power, able to do things as diverse as playing music and controlling your home’s smart appliances.
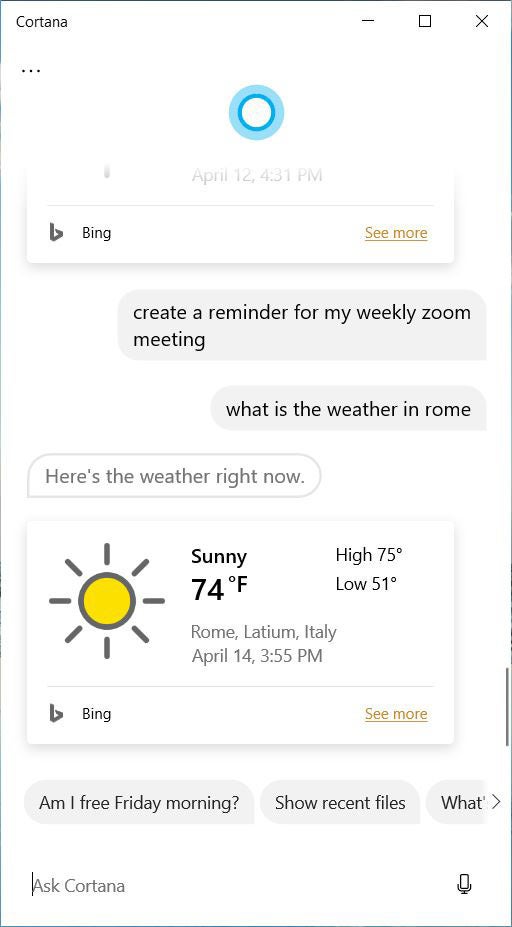
But those days are gone. Microsoft has dramatically cut back on Cortana’s features, and it is no longer closely integrated into Windows and Windows Search. Now, Cortana is its own app that works like any other Windows 10 app, including running in a resizable window that can be moved around the screen.
The only way to use Cortana is to run the app. Start it by clicking the Cortana icon in the taskbar just to the right of the search box, pressing the Windows key + C, or saying “Hey, Cortana.” You can then speak your search, or type your search into the app.
 IDG
IDGCortana is no longer integrated with the Search box; it now displays results in its own window.
When you ask Cortana a straightforward question or issue a straightforward command, Cortana displays the result onscreen and reads it to you. However, if you ask a more complicated question that requires a display of web links, Cortana will show the links in the Edge browser.
To make sure that Cortana responds to “Hey Cortana,” click the Start button and select Settings > Privacy > Voice activation. Turn the slider on in Allow apps to use voice activation, then scroll down to “Choose which apps can use voice activation” and in the Cortana section, turn the slider on for Let Cortana respond to “Cortana” keyword. If you want to use Cortana even when your computer is locked, move the slider on next to Use Cortana even when my device is locked.
After that, click the Cortana button to the right of the Search box to launch the app. Click the three-dot icon at the top left of the screen and then click the Settings button (it’s in the shape of a gear) and select Keyboard shortcut. From here you can choose whether to have Cortana respond only to the Windows key + C shortcut, or also via speaking.
You can also remove the Cortana button to the right of the search box. Right-click the taskbar and uncheck Show Cortana button from the menu that appears.
(You can even turn off the search box in this way. Right-click the taskbar, select Search, and click Hidden.)
Although Microsoft has scaled back Cortana, there are a number of things it can do for you. The best is the way it can remind you about tasks or upcoming events. It’s easy to set a reminder — just say or type in plain English what you want to be reminded about, for example, “Create a reminder for my weekly Tuesday 2pm Zoom meeting.” In order for Cortana to pop up alerts about the reminders you’ve set, you need to turn on Windows 10’s notification feature. To do it, go to Settings > System > Notifications & actions and then turn the slider on in the Get notifications from apps and other senders section.
For more about using Cortana, see “4 quick tips for Cortana in Windows 10.” And for a look at where Cortana is headed, see “Cortana explained: The rocky past and promising future of Microsoft’s digital assistant.”
Using search
The Windows 10 search you’ve been used to since the operating system was introduced has changed over time, notably when Cortana and Search went their own ways. So even if you think you know how it works, you might want a refresher, which I’ll provide here.
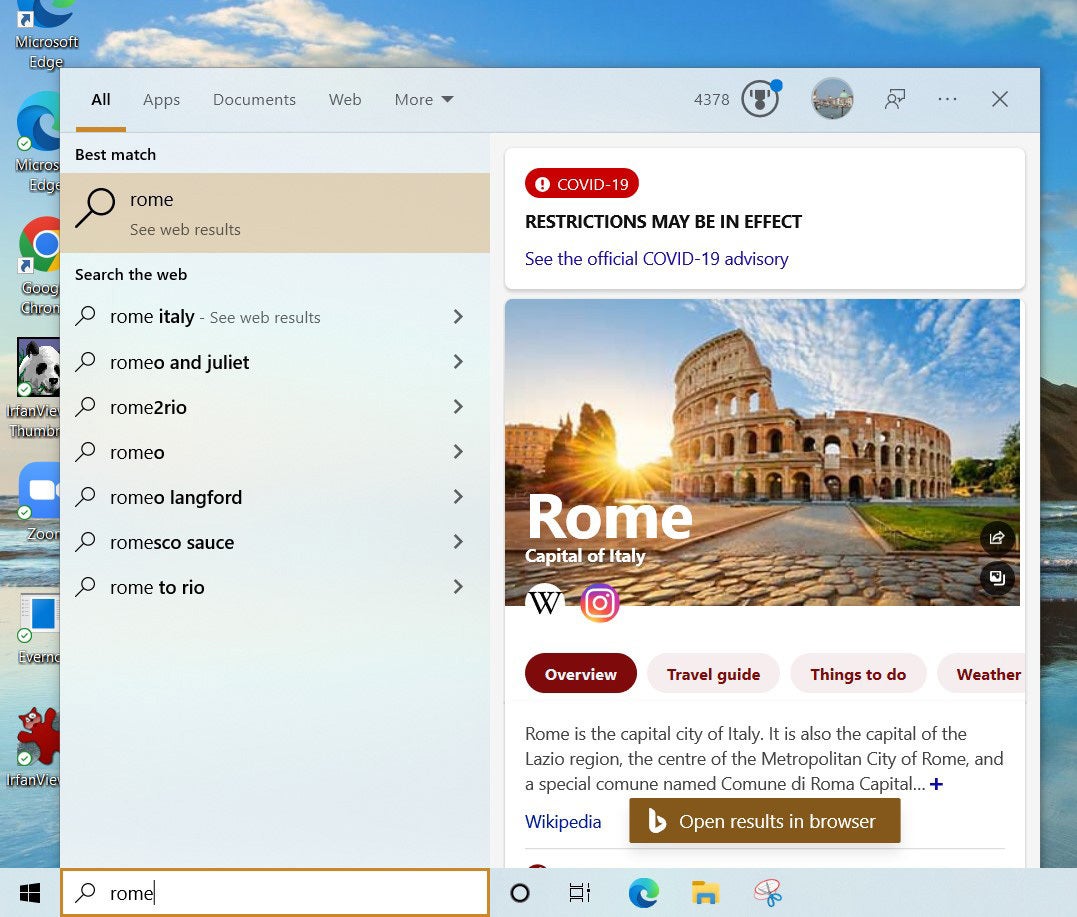
To do a search, type it into the Search box at the bottom left of the screen, or if you have a Search icon there rather than a box, click the icon and type in your search on the screen that appears. (To make the search icon appear, right-click the taskbar and select Search > Show search icon. To have the Search box appear there instead, right-click the taskbar and select Search > Show search box.) Search uses the Bing search engine to look through your files, your Microsoft OneDrive cloud storage, your videos and music, the apps on your PC, your settings, your email, and the web. When you do a search, a series of tabs appears across the top of the screen:
- All displays all search results.
- Apps shows any app-related matches.
- Documents shows documents on your PC that match the search.
- Web displays results from the web.
- More shows results from other places, including individual folders, email and apps including Music, People, Photos, Settings, and Videos. You’ll have to click the down arrow next to More to see them all.
 IDG
IDGSearch shows results in a flyout mini-browser.
The Search box can be useful even if you don’t do a search. Put your cursor in it and you’ll see a list of the apps you most frequently use, as well as a list of “Quick searches” you can click to get news, weather, events that happened today in history, and coronavirus trends. Click a search or app to open it.
Putting your cursor in the search box also lets you do targeted searches — you can limit searches to just apps, documents, the web, and more. Click the appropriate tab at the top of the screen and type in your search.
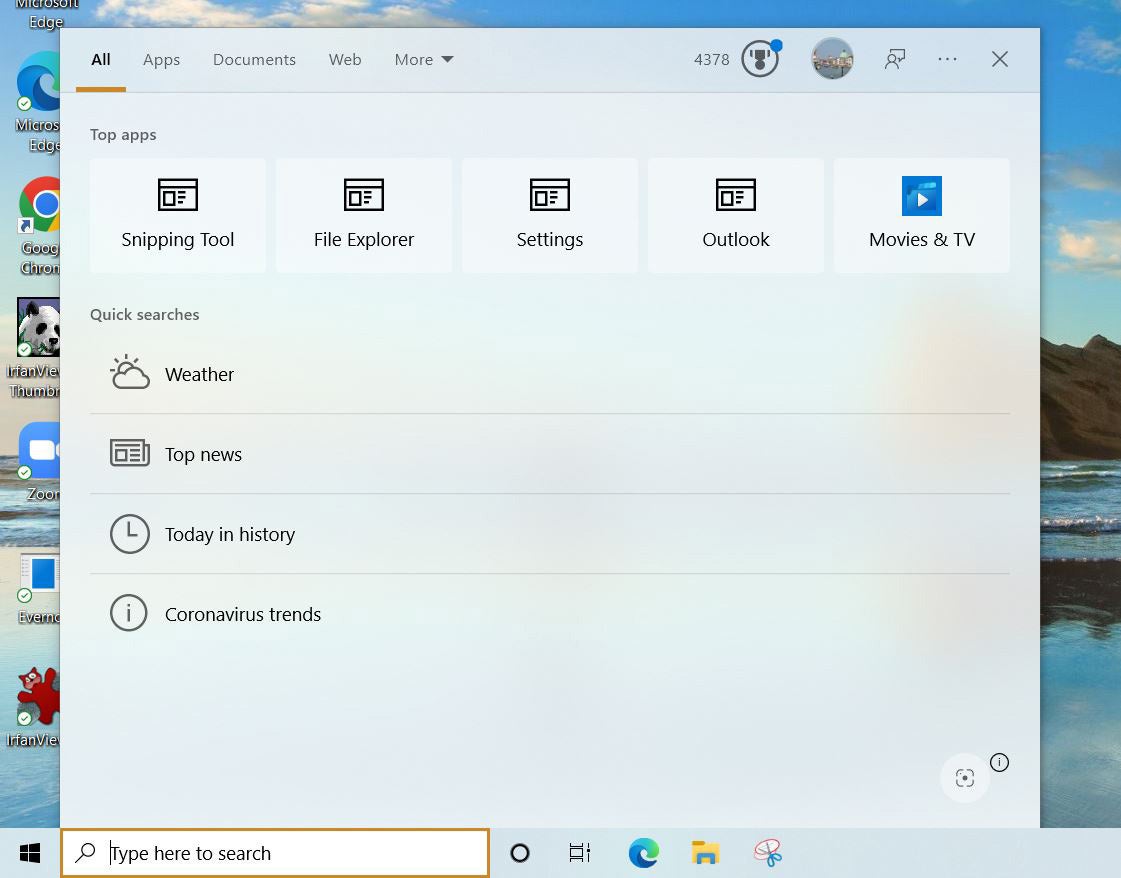 IDG
IDGPut your cursor into the search box to see your most-used apps and to do targeted searches.
By default, Search only looks through a limited selection of default libraries and folders including OneDrive, Documents, Downloads, Music, Pictures, Videos, and Desktop. It won’t find files kept in other locations on your PC. However, you can change that. Go to Settings > Search > Searching Windows, and in the “Find My Files” section, select Enhanced. That will tell Windows to search through your entire PC. If there are folders you want to exclude from the search, go to the “Excluded Folders” section, then click Add an excluded folder and browse to the folder you don’t want to search.
